ODK-X Survey
ODK-X Survey is an Android application for performing data collection in the ODK-X framework. It operates similarly to ODK Collect, but is based on HTML, CSS, and Javascript rather than native Android, and is more flexible in its presentation and execution.
Note
ODK-X Survey only works on Android 5.0 and newer devices.
Note
ODK-X Survey cannot read or display the forms created for ODK Collect (that is, those created via ODK Build, XLSForm, or other form design tools). ODK-X Survey operates with ODK-X Data Management Applications*.
Prerequisites
If you have not installed Survey already, follow our guide for Installing ODK-X Basic Tools
Using ODK-X Survey
We have included a sample application built on top of Survey along with a handful of forms that showcase some of its features in Trying Out ODK-X Survey.
Warning
Survey forms are defined in HTML, CSS, and JavaScript that can be edited by your organization. If the interfaces displayed in this guide do not match the form you have on your device, contact an administrator in your organization for further guidance.
Opening a Form
The home screen of Survey displays a list of all the forms available on the device.
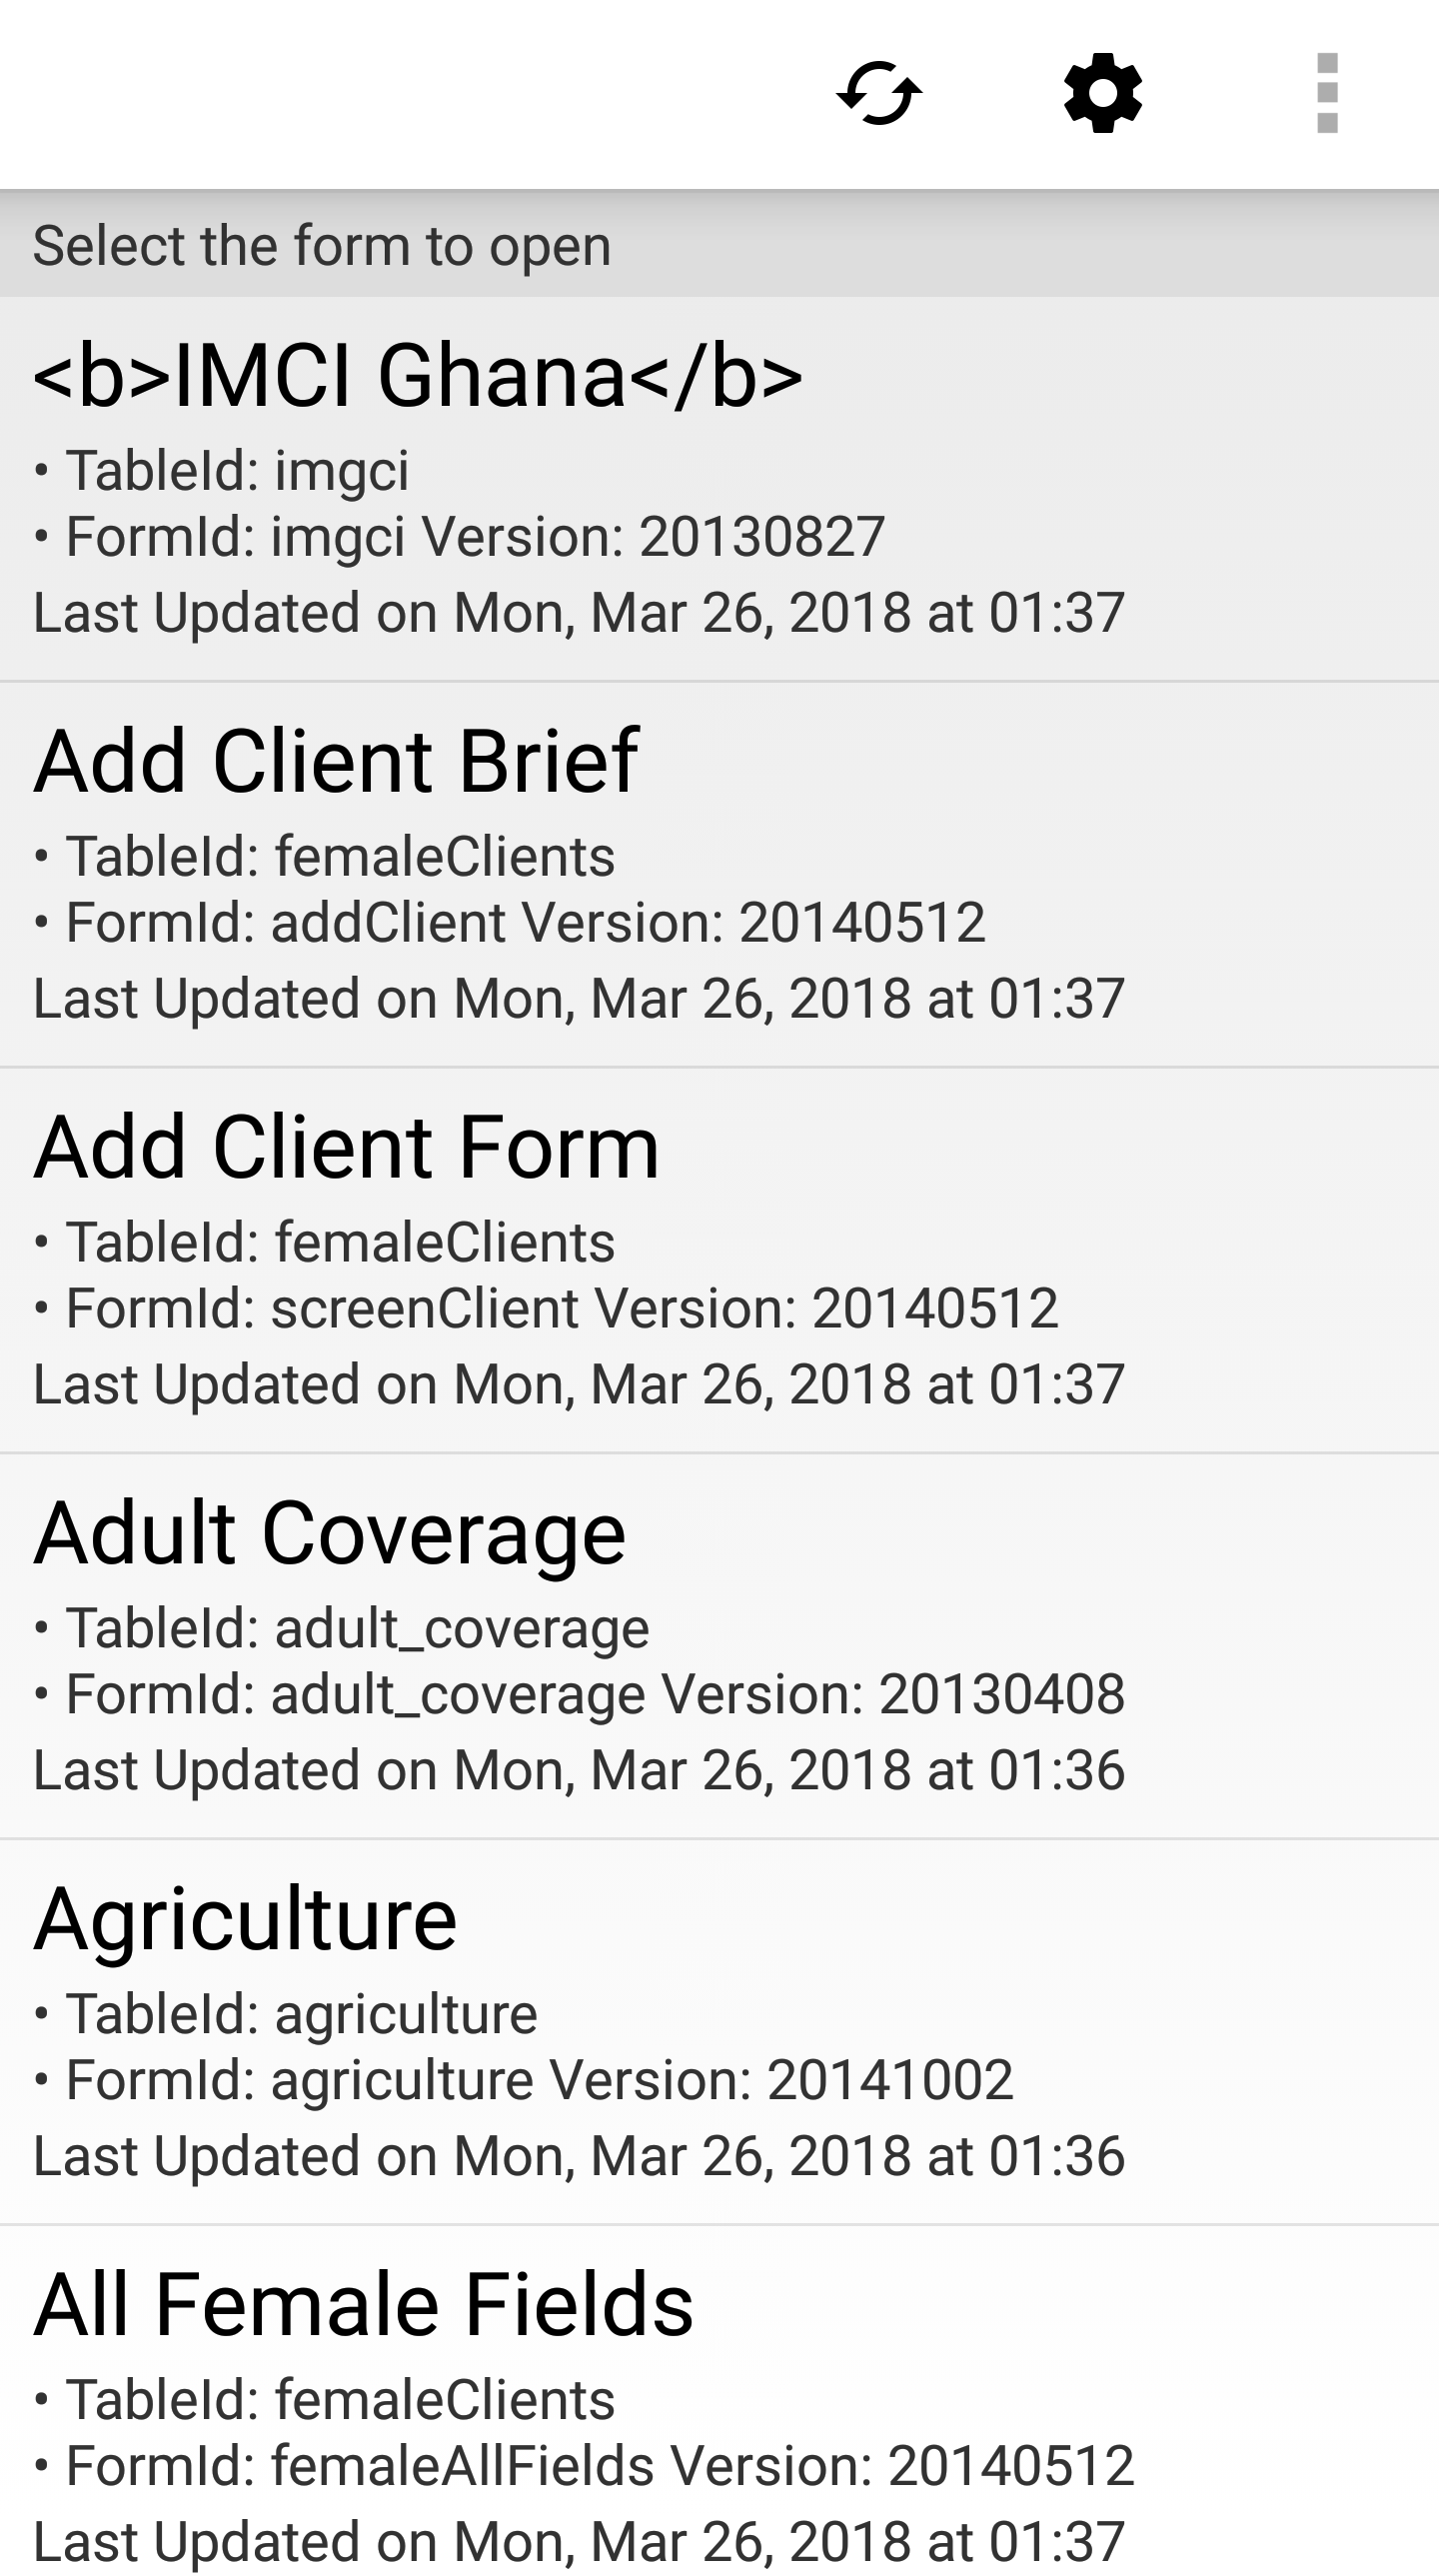
Note
Not all forms listed on this home screen are intended to be launched directly. Subforms will be listed on this page but are generally intended to be opened from within a parent form.
To open a form tap its name on the list. This will launch the home screen of that particular form. Below we have opened the .
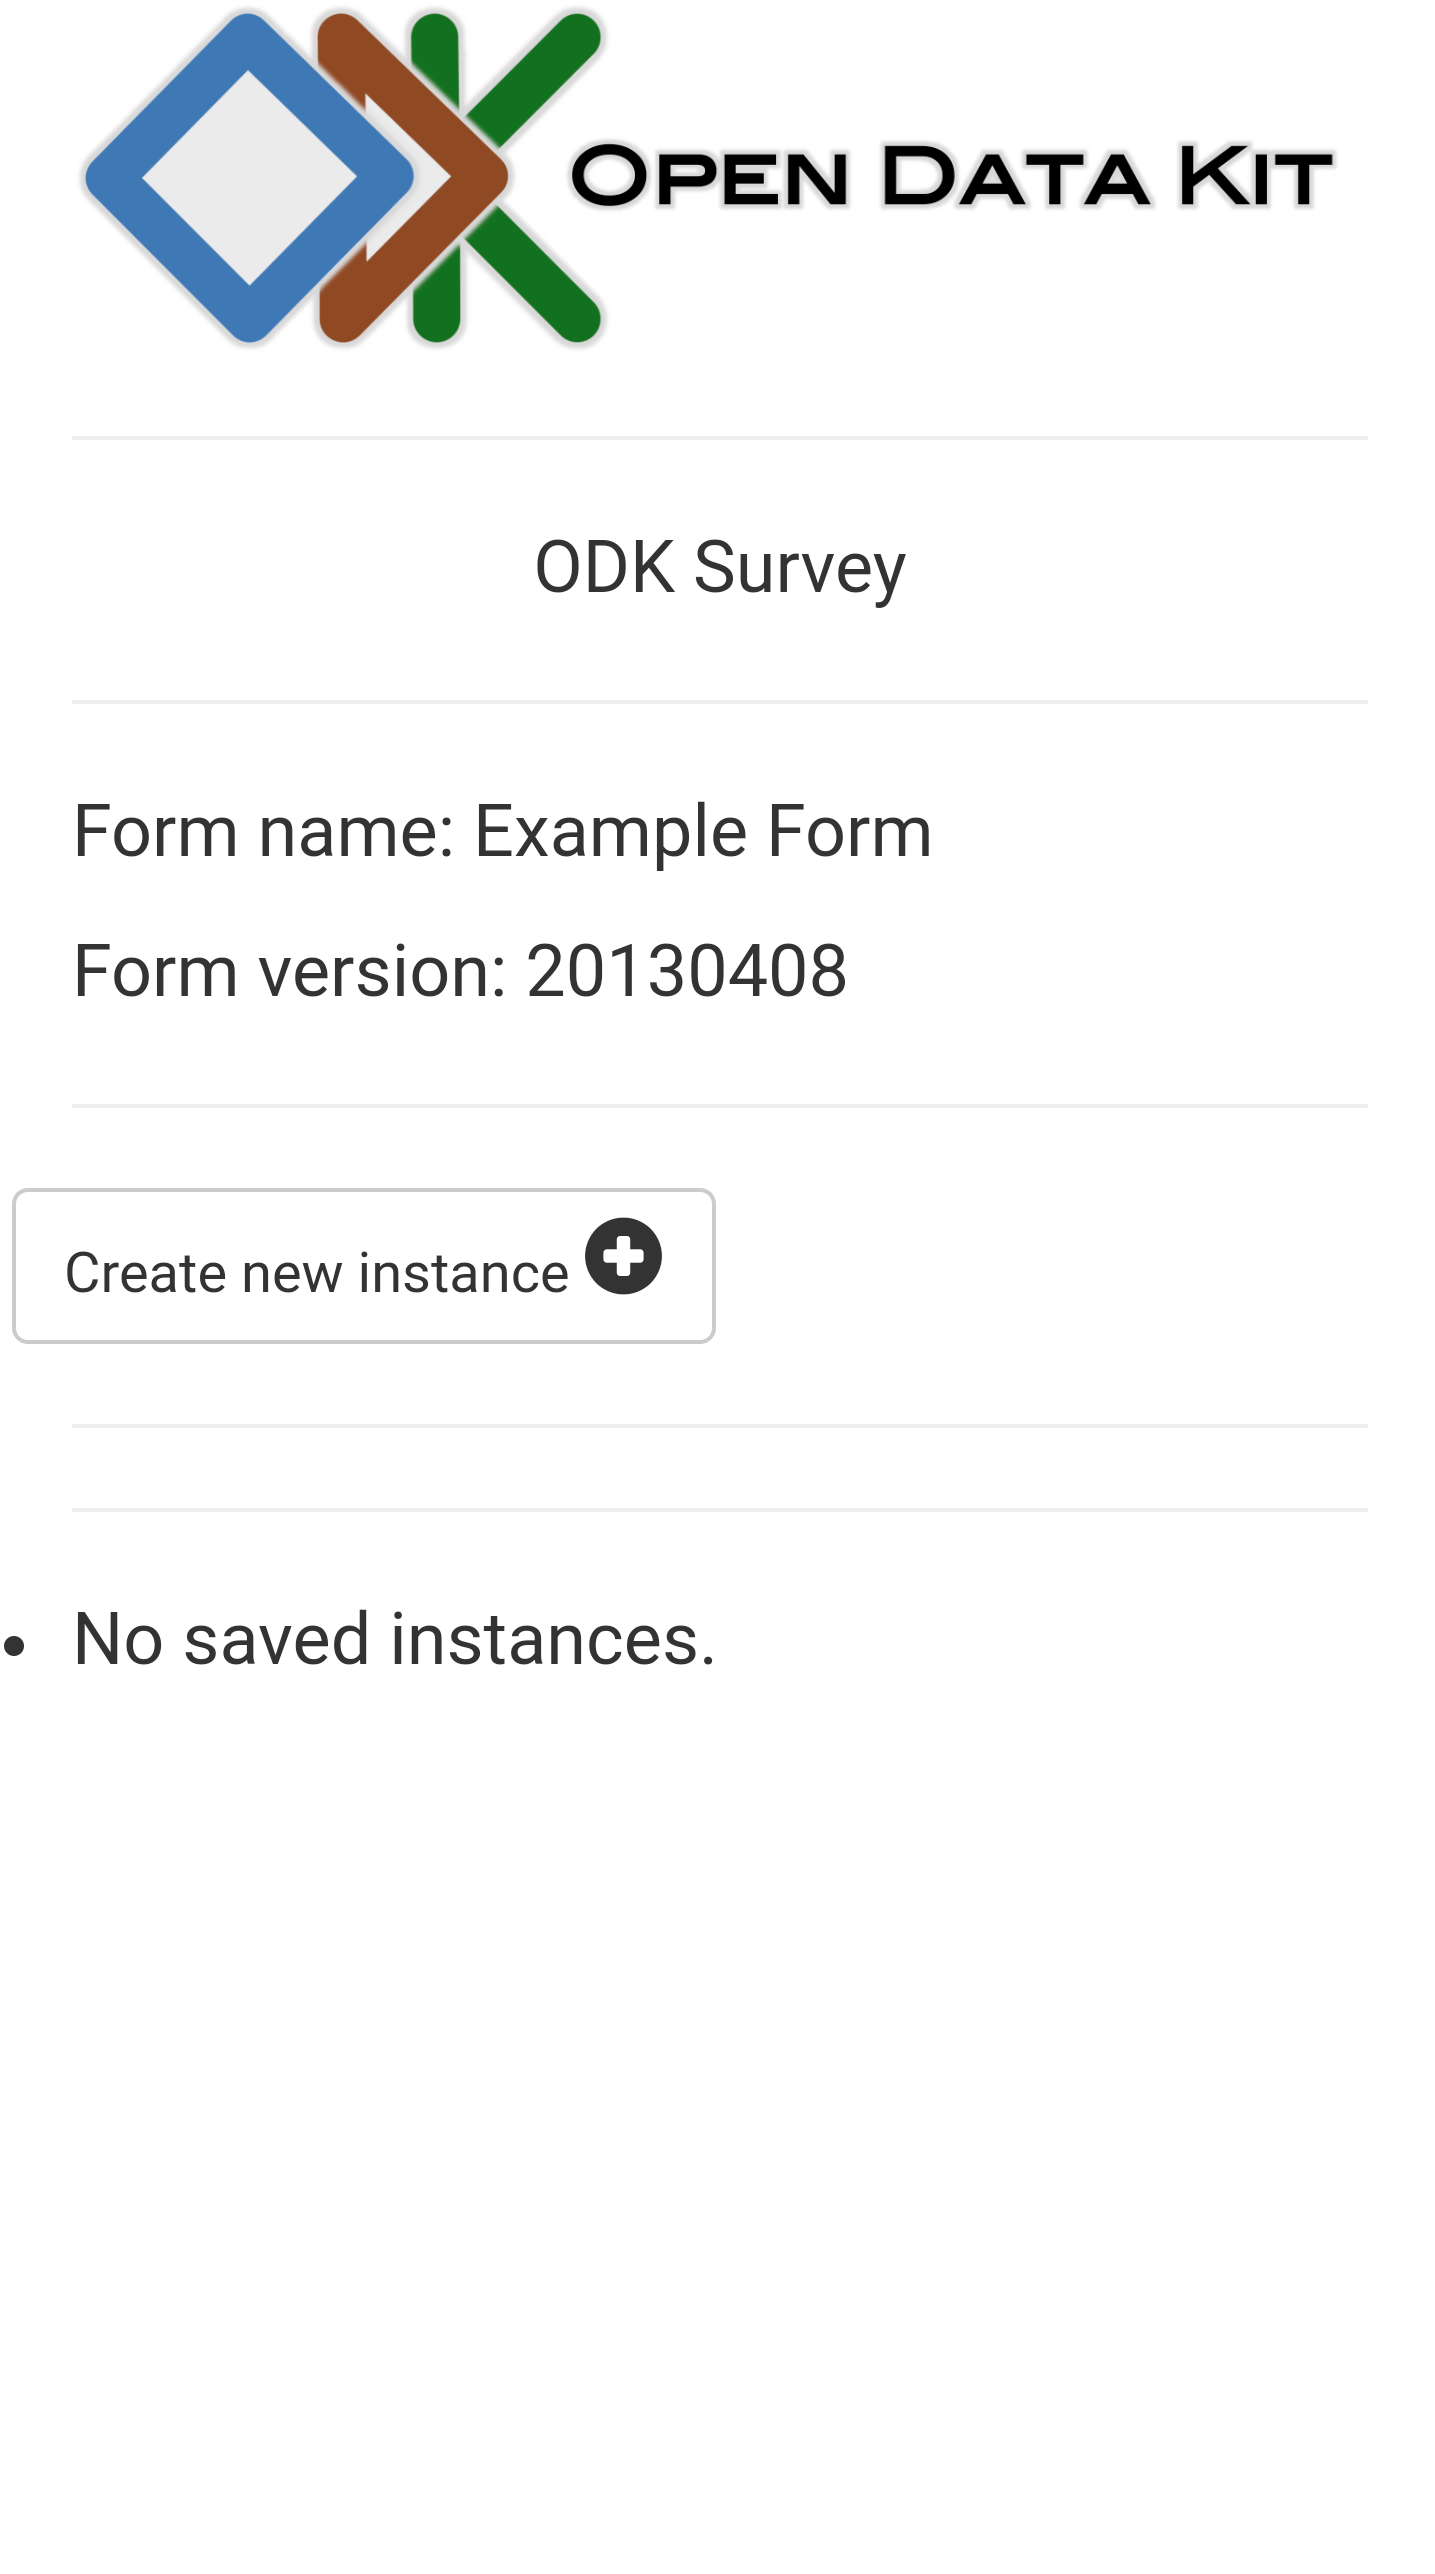
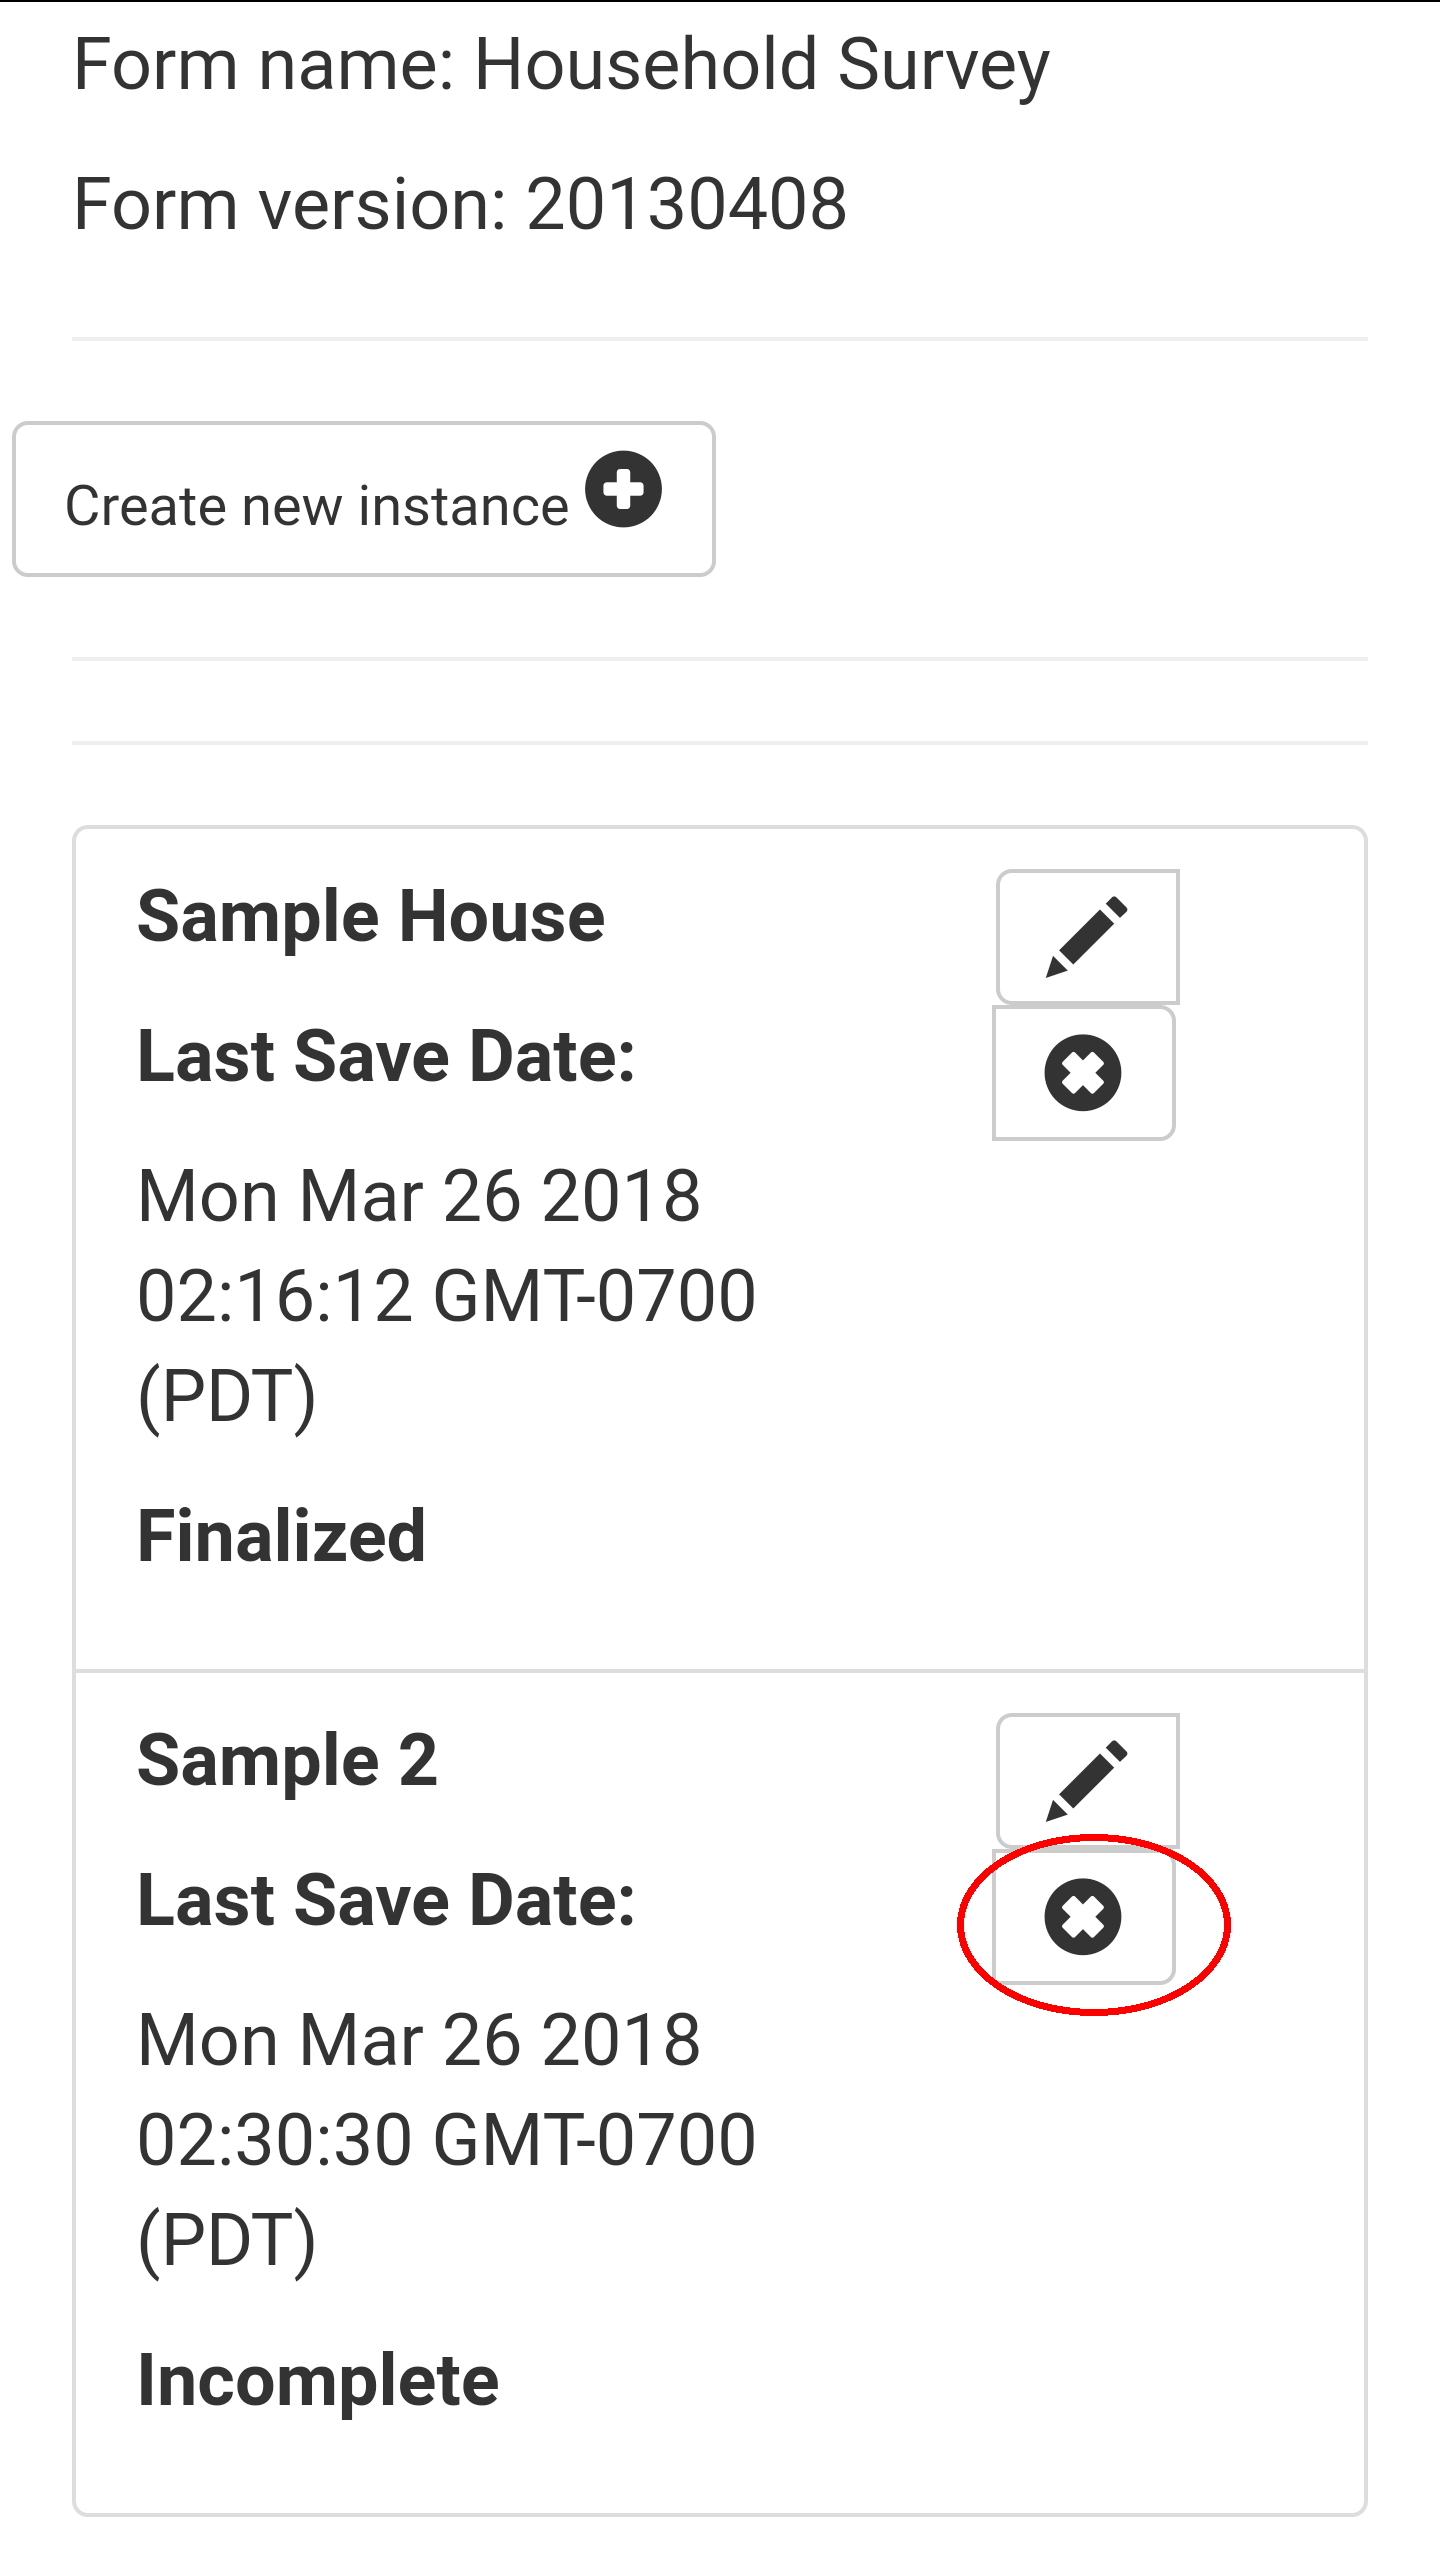
This screen shows the form name and version. It also shows a full list of saved instances of the form. For more information on viewing and editing these form instances see the section on Viewing Saved Form Instances.
To start a new instance and begin filling in a form, tap the Create new instance button.
Opening a Subform
Unlike their parents, subforms are generally not intended to be opened from the Survey home screen's form list. Instead, subforms are integrated into their parent forms and launched directly as prompts. They integrate seamlessly into their parent forms and do not need to be manually opened. They might be indicated by a Create new instance button within a form, or the form may directly launch the subform.
For example, the Household Member Survey is a subform of the Household Survey in the Survey sample app.

This screen within the Household Survey shows the launcher for the Household Member Survey subform. Clicking Create new instance will launch the subform.

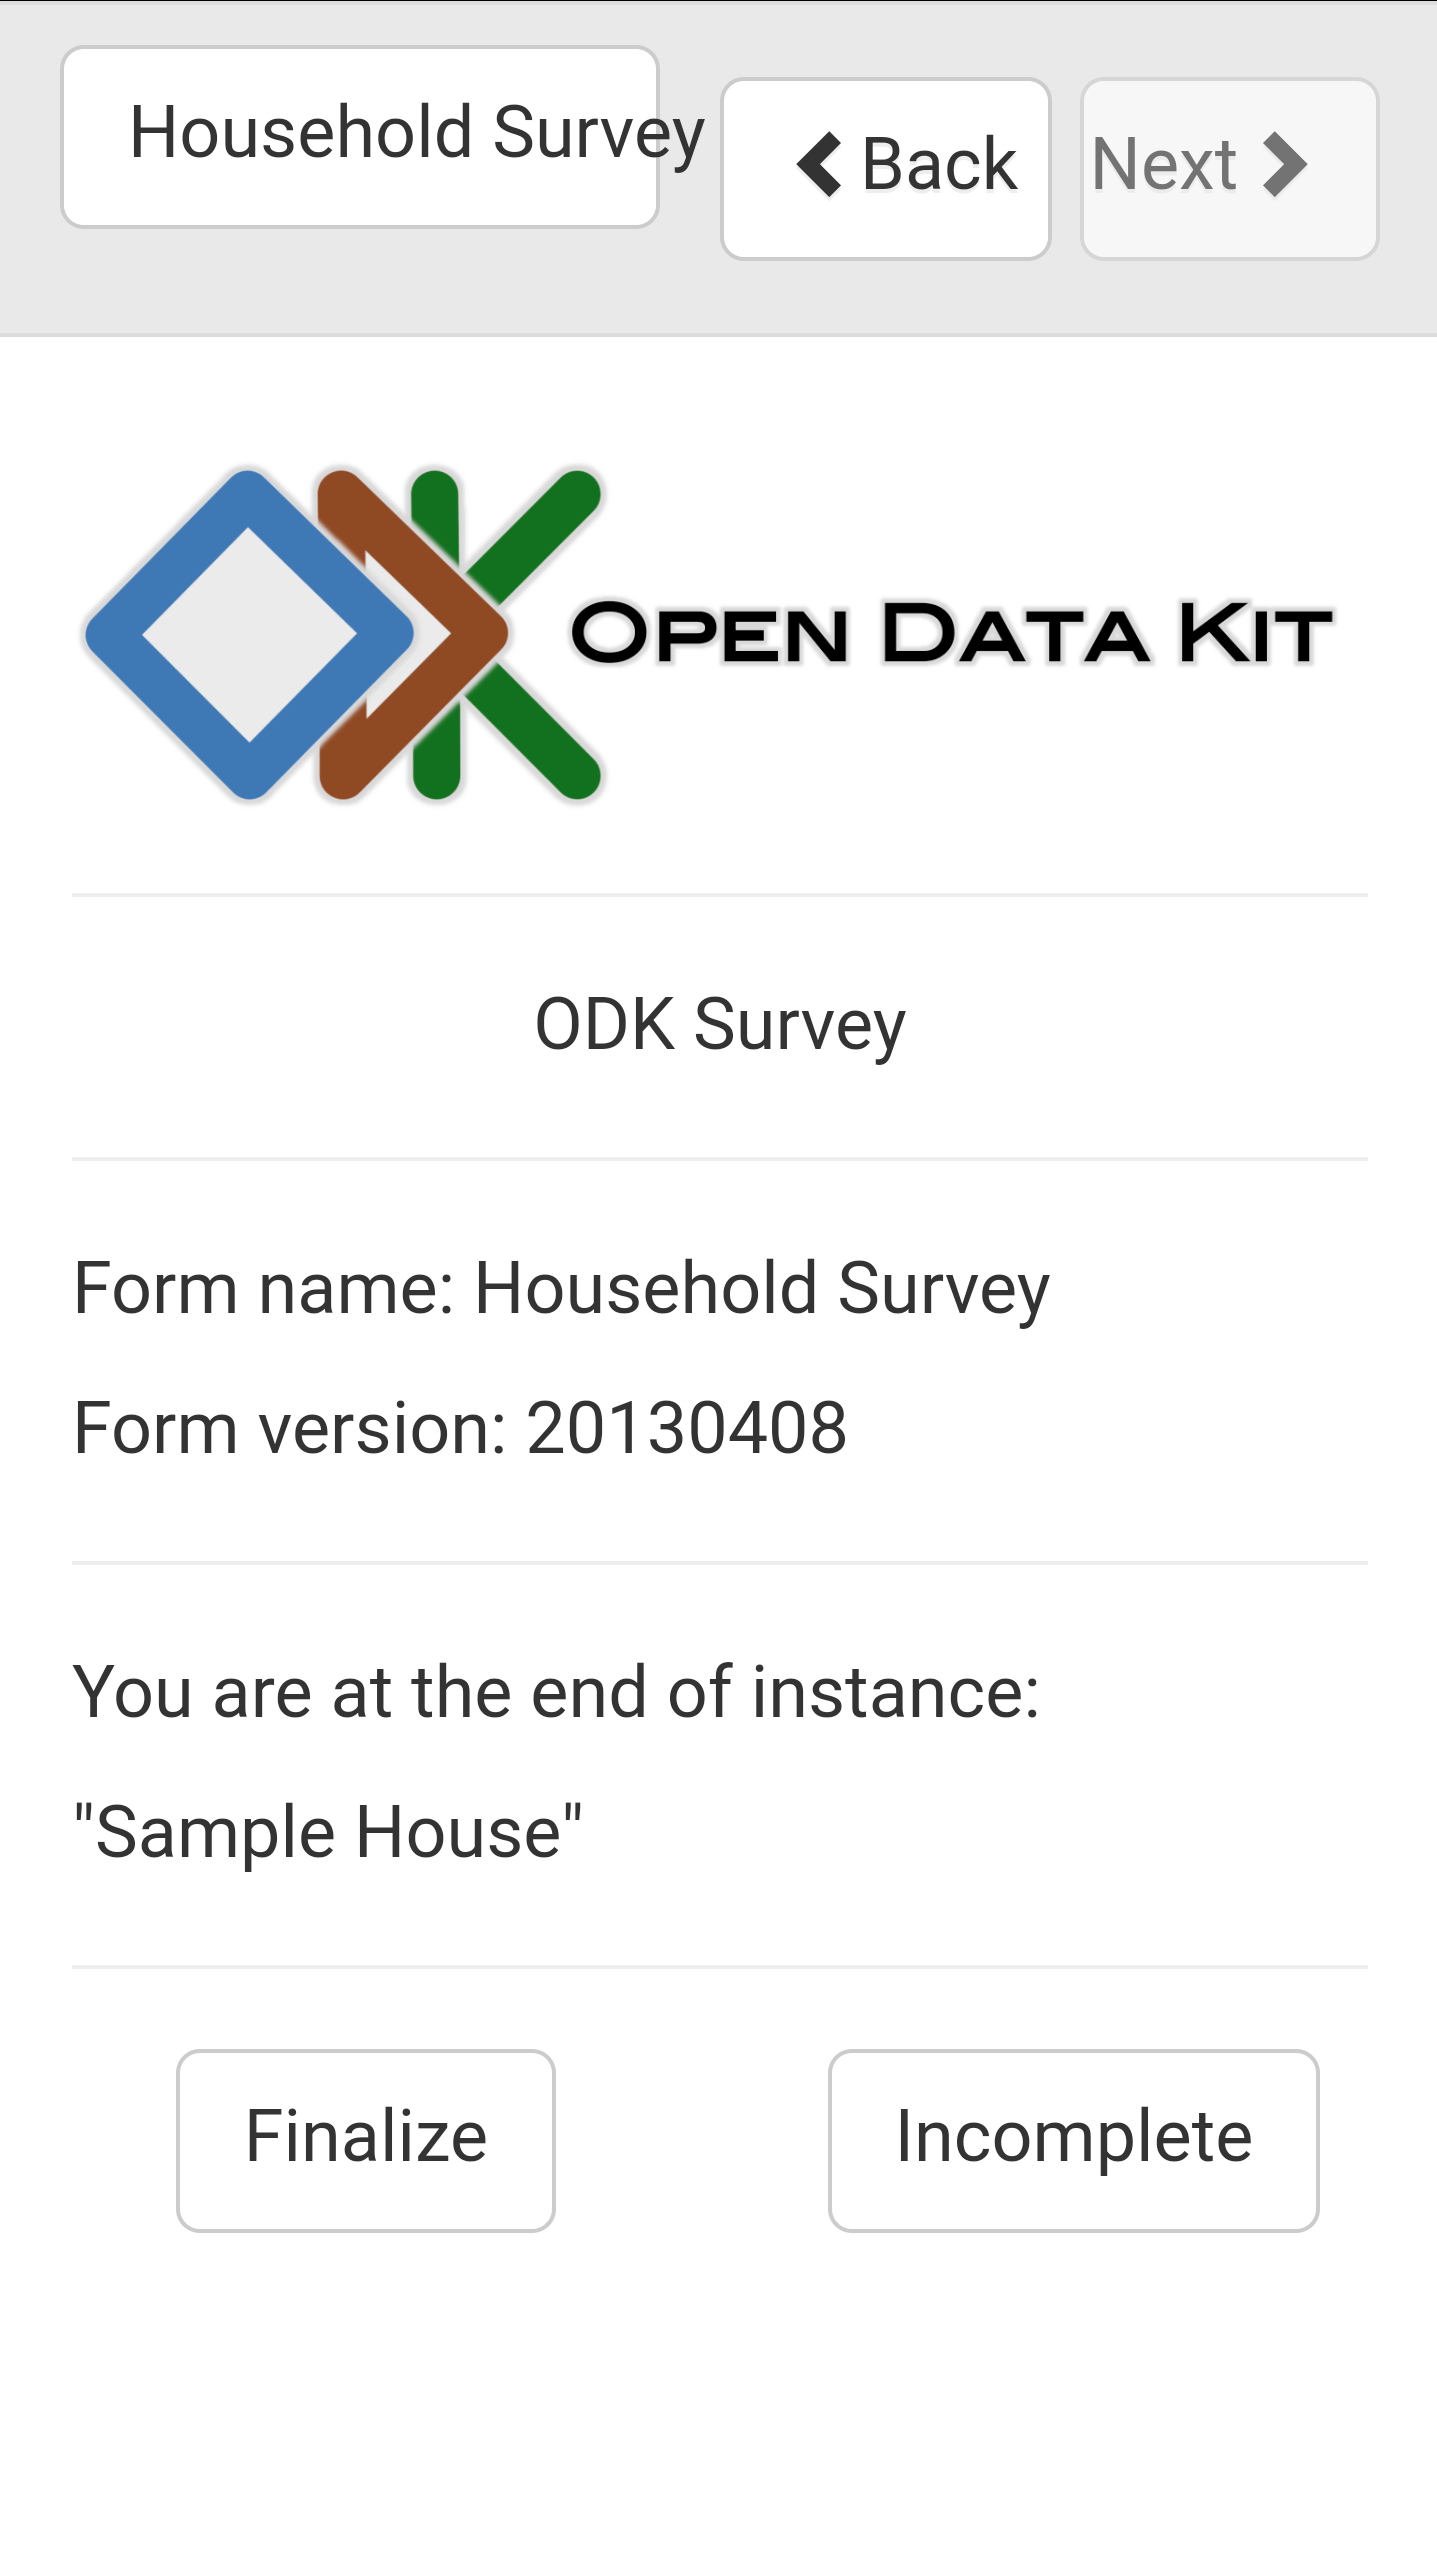
This is the first page of the Household Member Survey subform. It displays the name of the household, Sample House, which was collected in its parent Household Survey form. After this subform has been filled in, the flow will return to the parent form.

Completing the Household Member Survey subform returns us to the same screen we launched from in the Household Survey. The instance created by the subform is now displayed. If you tap the Create new instance button again, you can create multiple instances.

Ordering Forms List
All the forms listed on the home screen can be ordered in two ways either by Table ID or Name. Press the action button (⋮) and select the .
The screen will show two options as and as described below:
Order by Table ID: The forms list will get ordered according to the Table ID
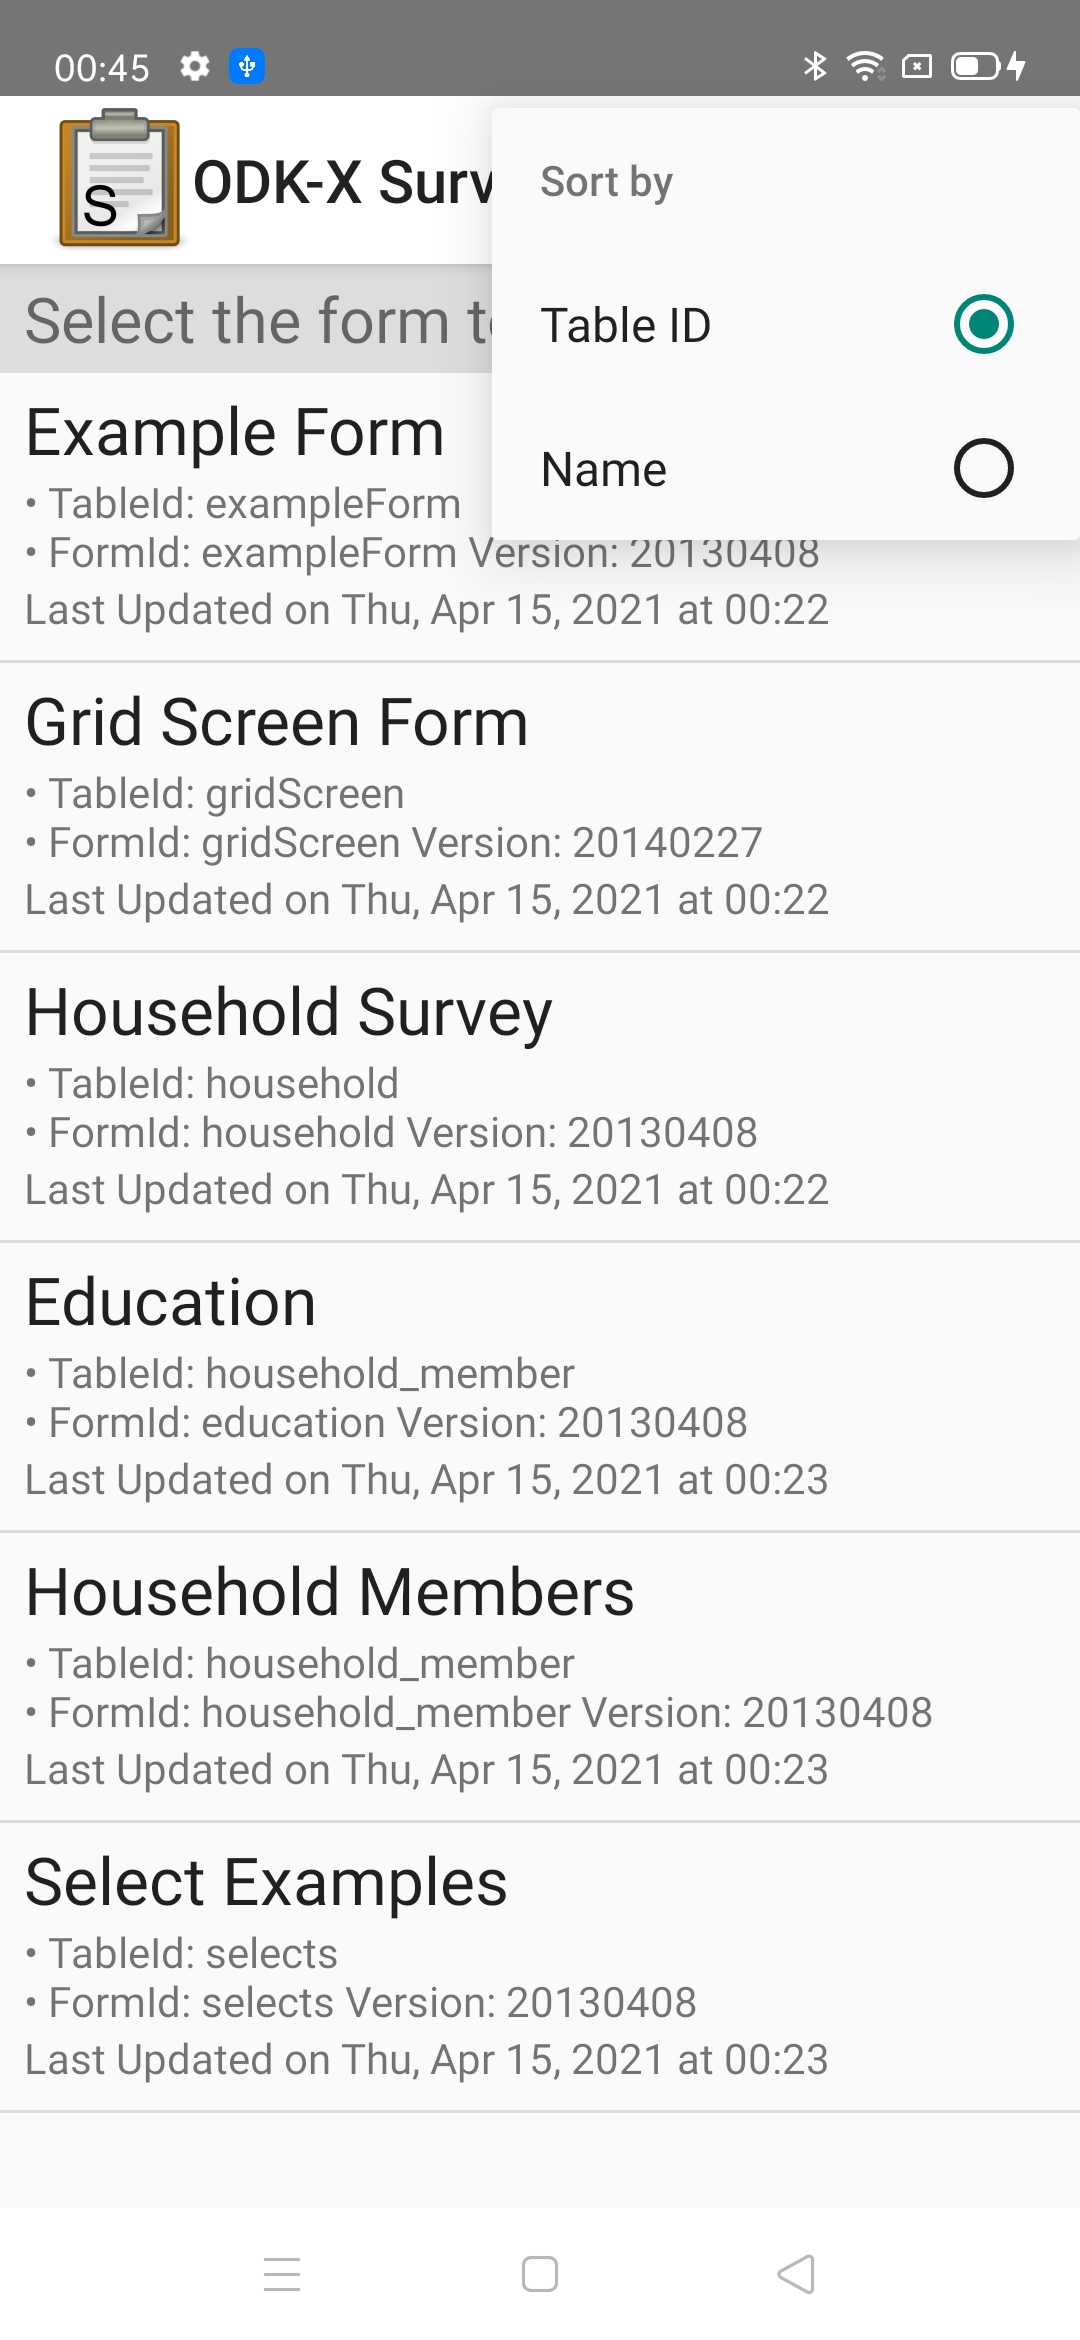
Order by Name: The forms list will get ordered according to the Name

Saving a Form Instance
When saving a form instance, you can either mark it as Finalized or Incomplete.
Finalized forms indicate that they are completed and that the data should be used and aggregated.
Incomplete forms indicate that the form has been saved but it is not yet complete. This is useful if you need to stop filling out a form and return to it later, but want to keep your previously collected values.
Note
Marking a form as Finalized does not prevent you or another user from modifying it later.
There are three ways to save a form:
Navigate to the end of the form. This screen will show the buttons to save the form as Finalize or Incomplete, as described above. After choosing one of these options, Survey will return to its home screen.
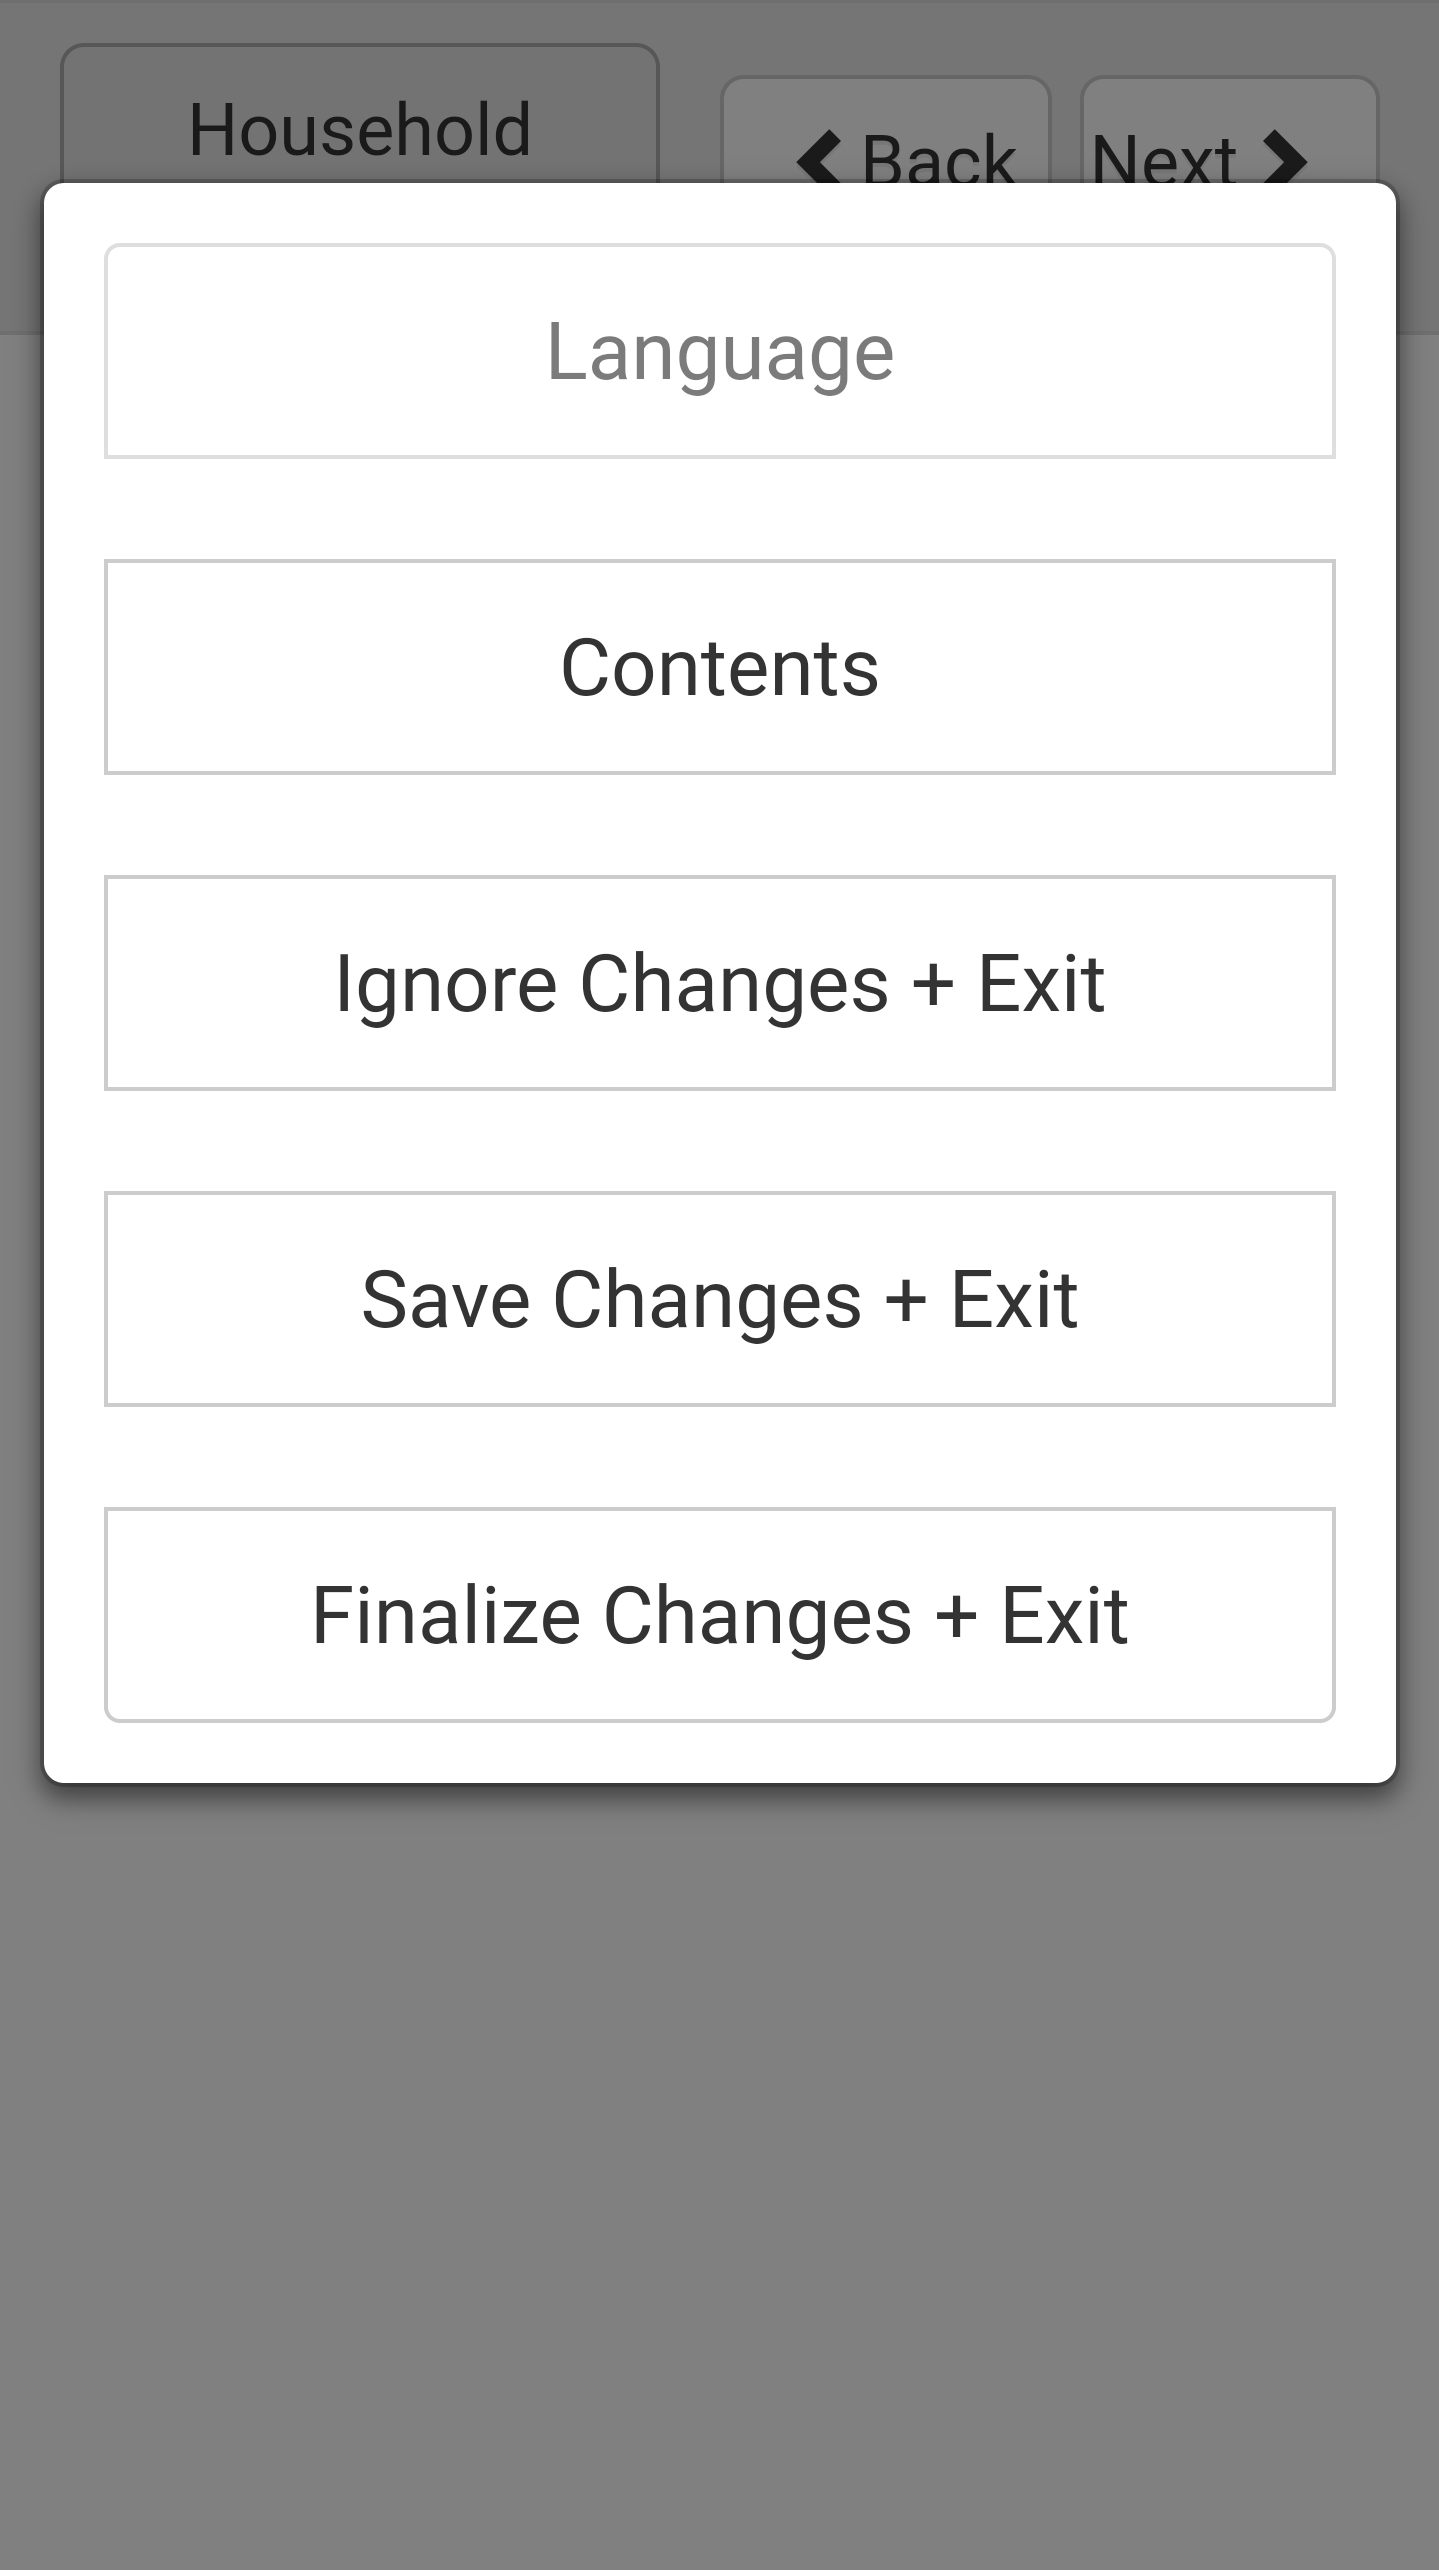
Tap the button with the name of the form in the upper left from any screen in the form. This will open a menu that provides navigation and exit options.
To save the form as Incomplete choose
To save the form as Finalized choose
Press the Android back button. This is not the Back button provided by ODK-X Survey in the upper right. This is the button to back out of apps. This will launch a menu with the option to which will save the form as Incomplete.
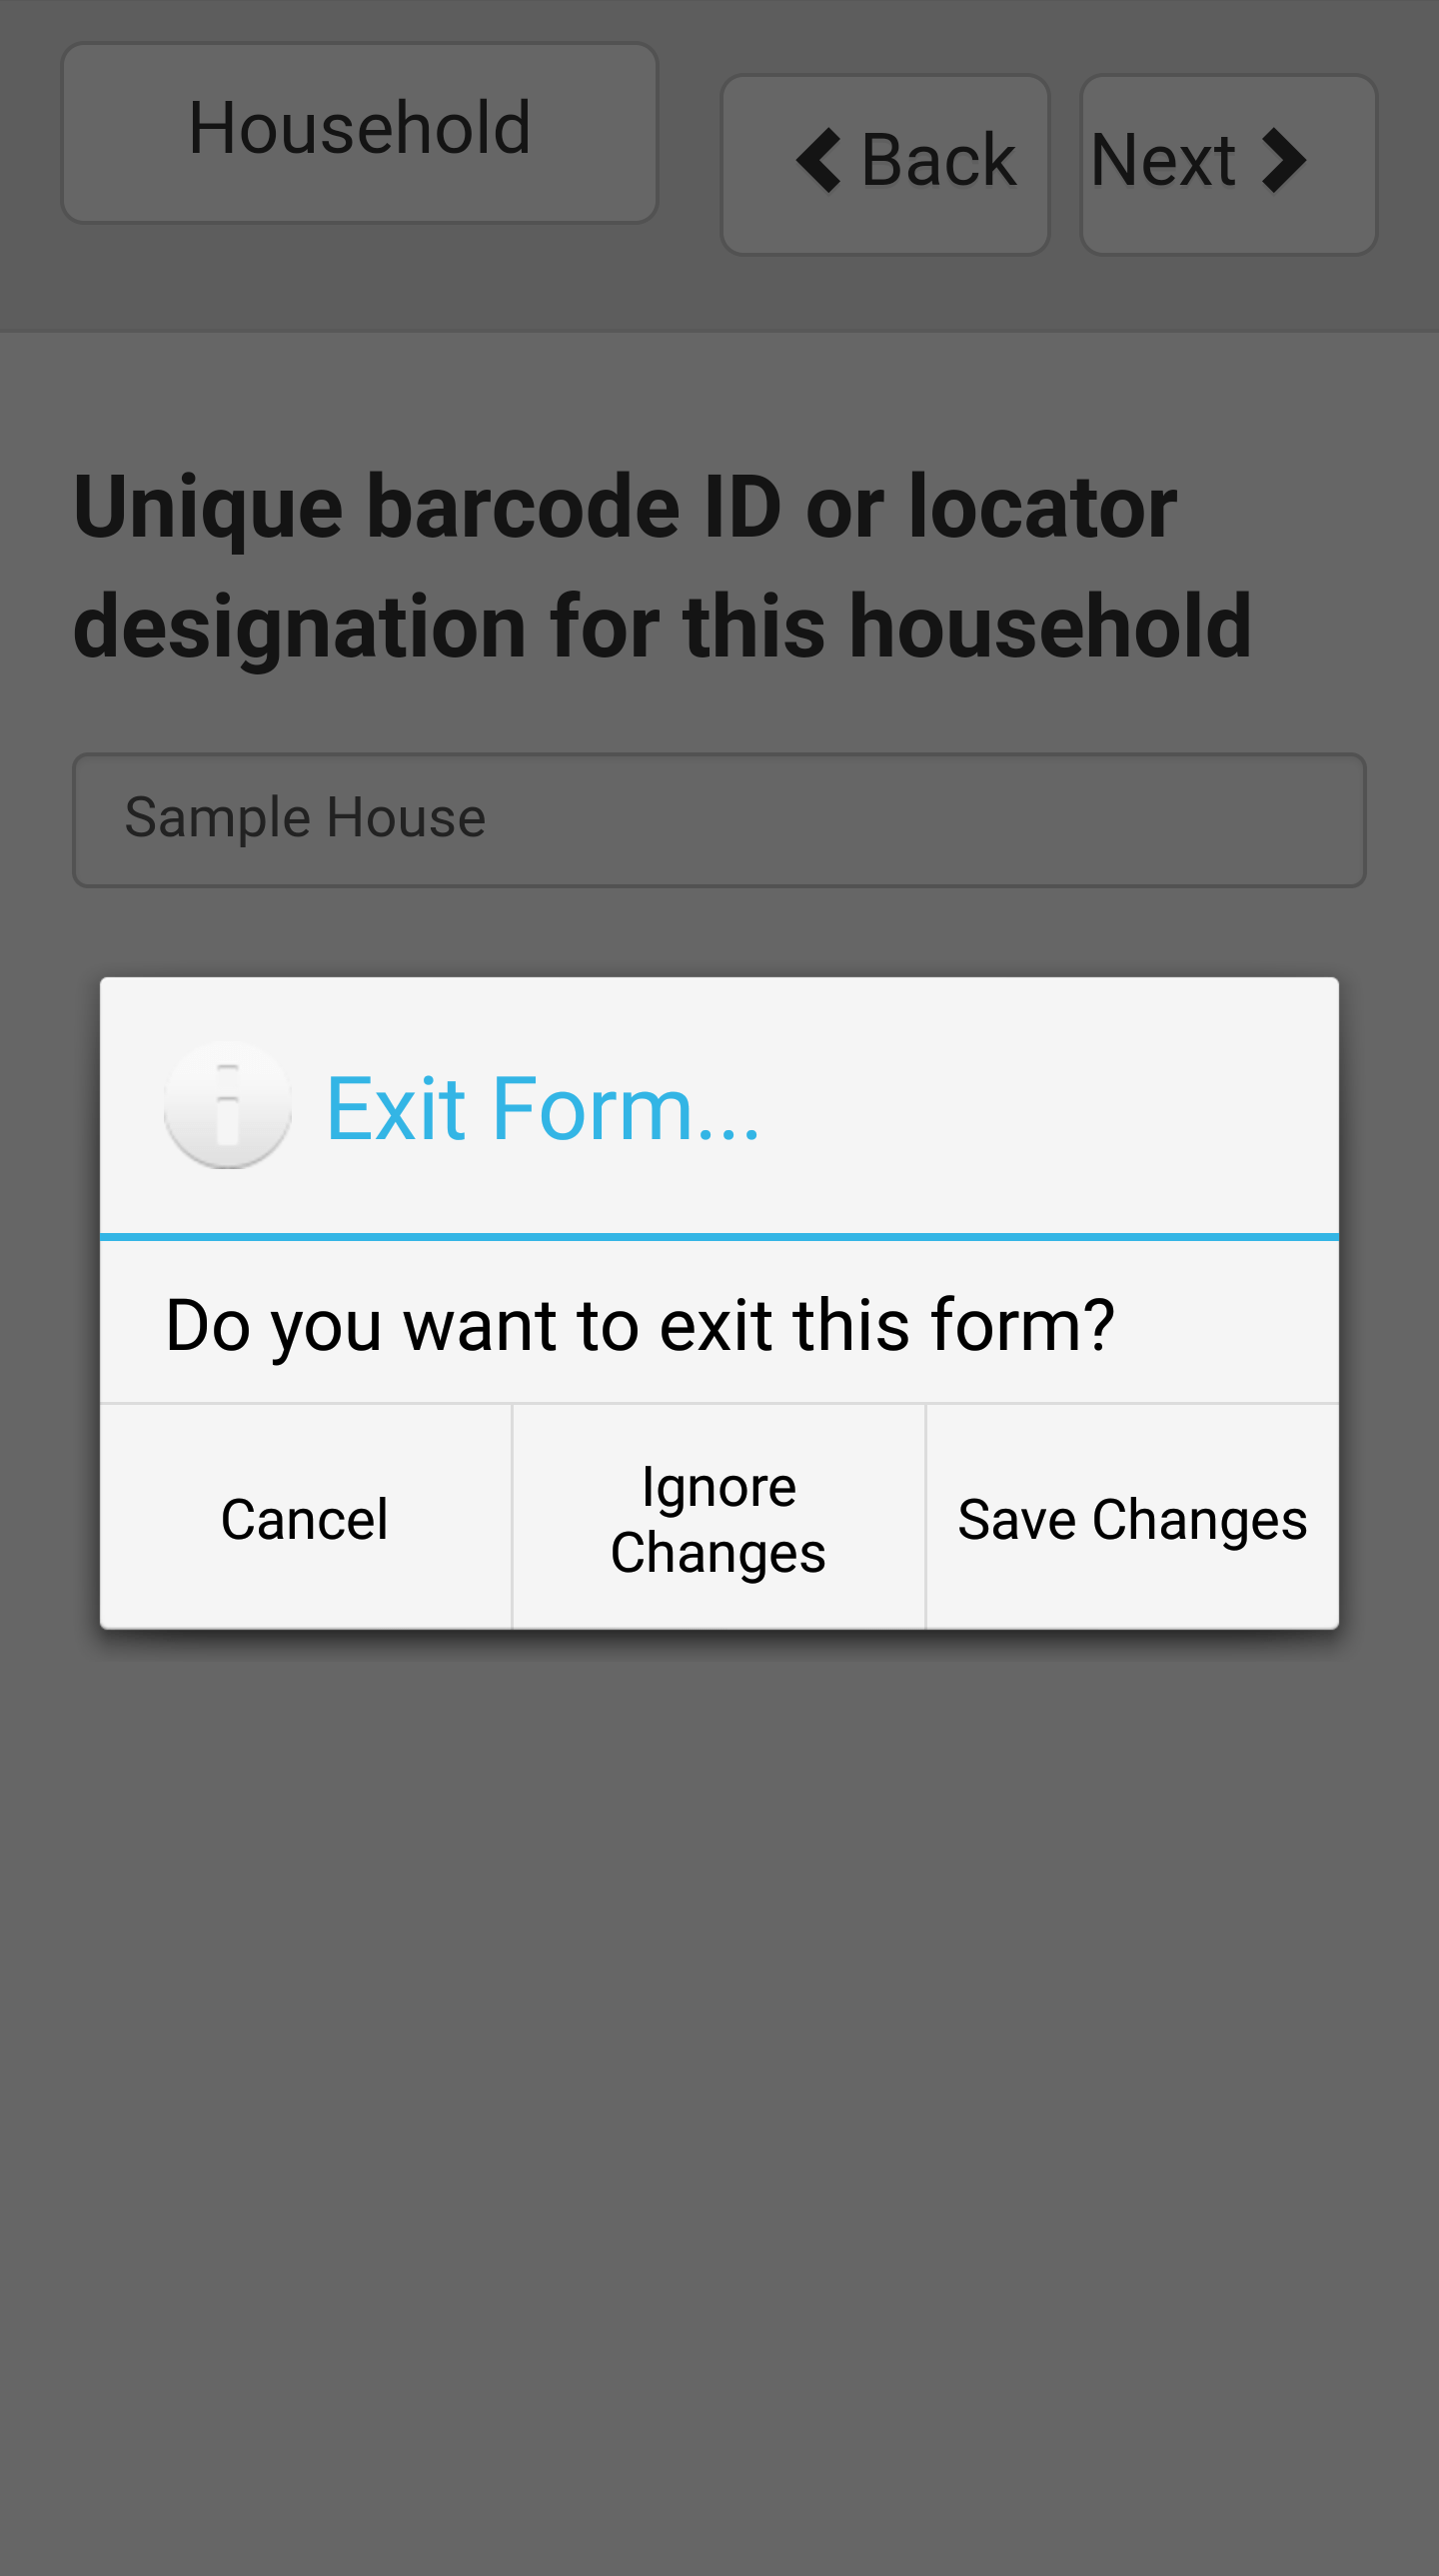
Note
This menu does not have an option to save a form as Finalized.
Viewing Saved Form Instances
A list of previously saved form instances is viewable on the home screen of each form. Open the desired form (instructions in the Opening a Form guide) to see this list.
Warning
This list of saved form instances is not limited to those collected on your device. After synchronization, this will include all form instances from all devices that have synced with the server. Take care not to edit form instances that you should not be editing.
To protect against unauthorized edits, see Data Permission Filters.
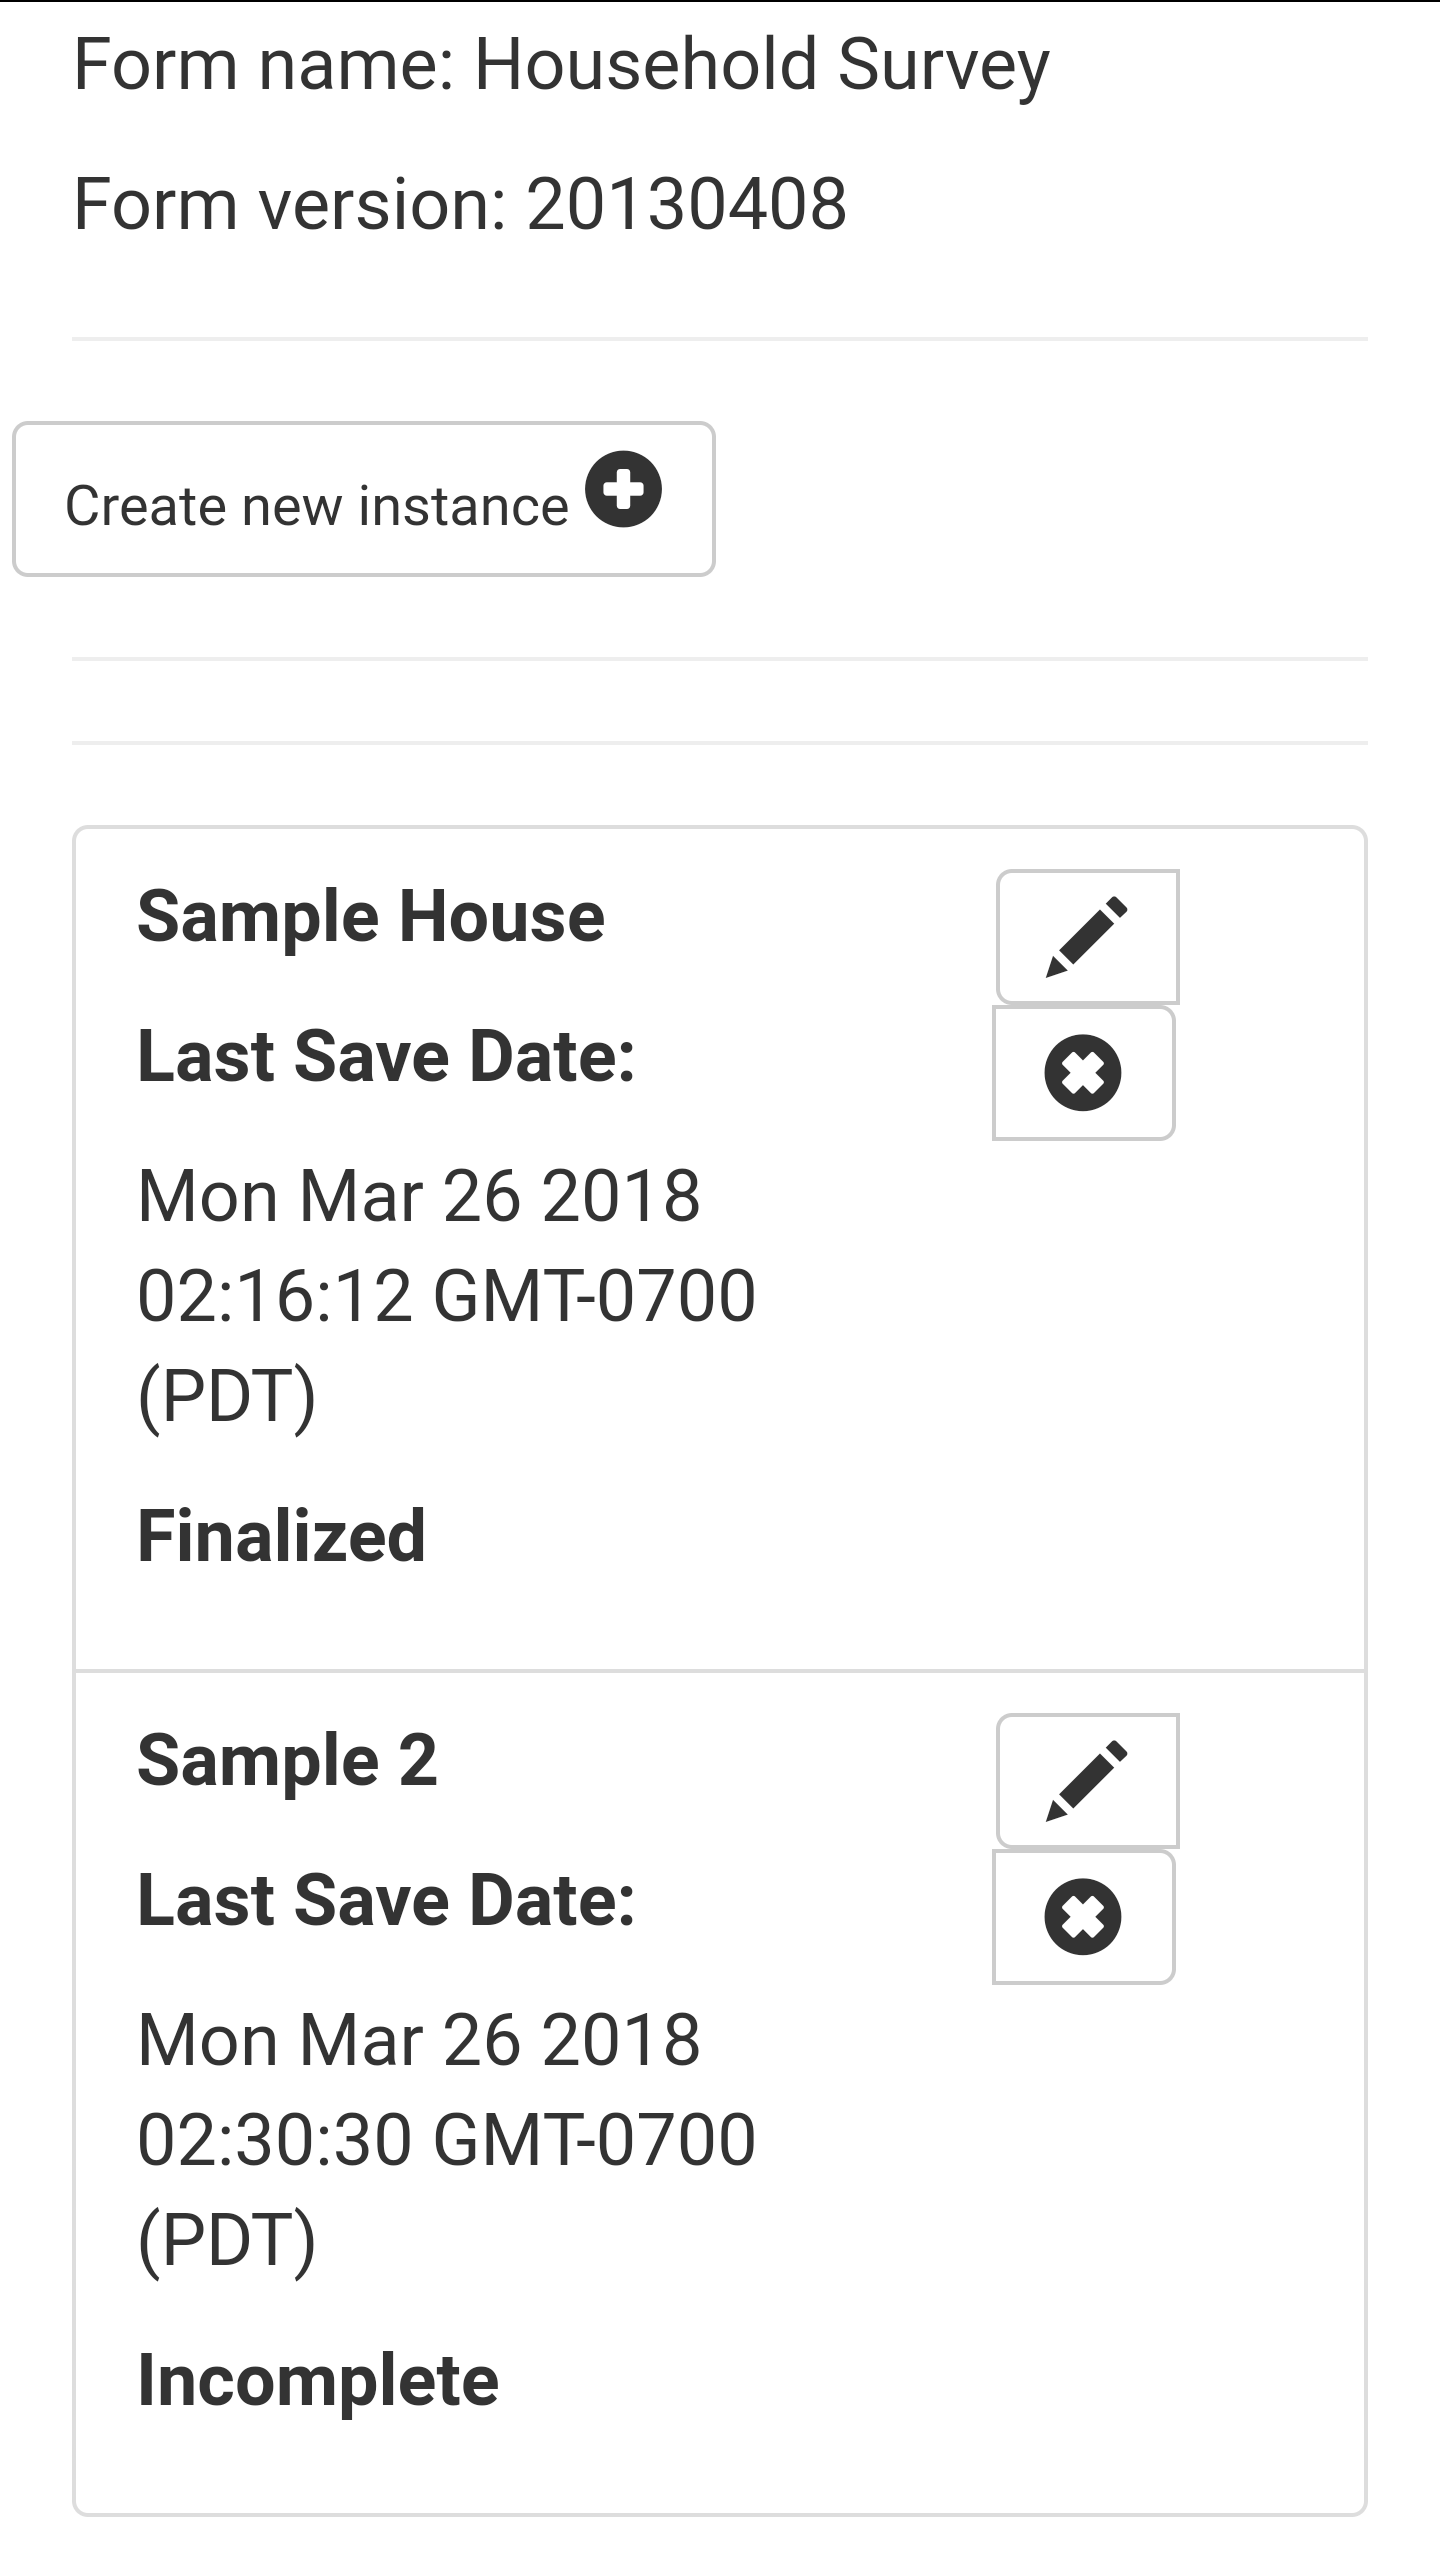
This list of instances is ordered reverse chronologically by the last saved date, with the most recently edited form instance on top and the oldest form instance at the bottom. These instances are marked as either Finalized or Incomplete (see Saving a Form Instance for definitions).
Editing Saved Form Instances
To edit a form instance, tap the pencil icon next to the instance in the instance list on the form home screen.
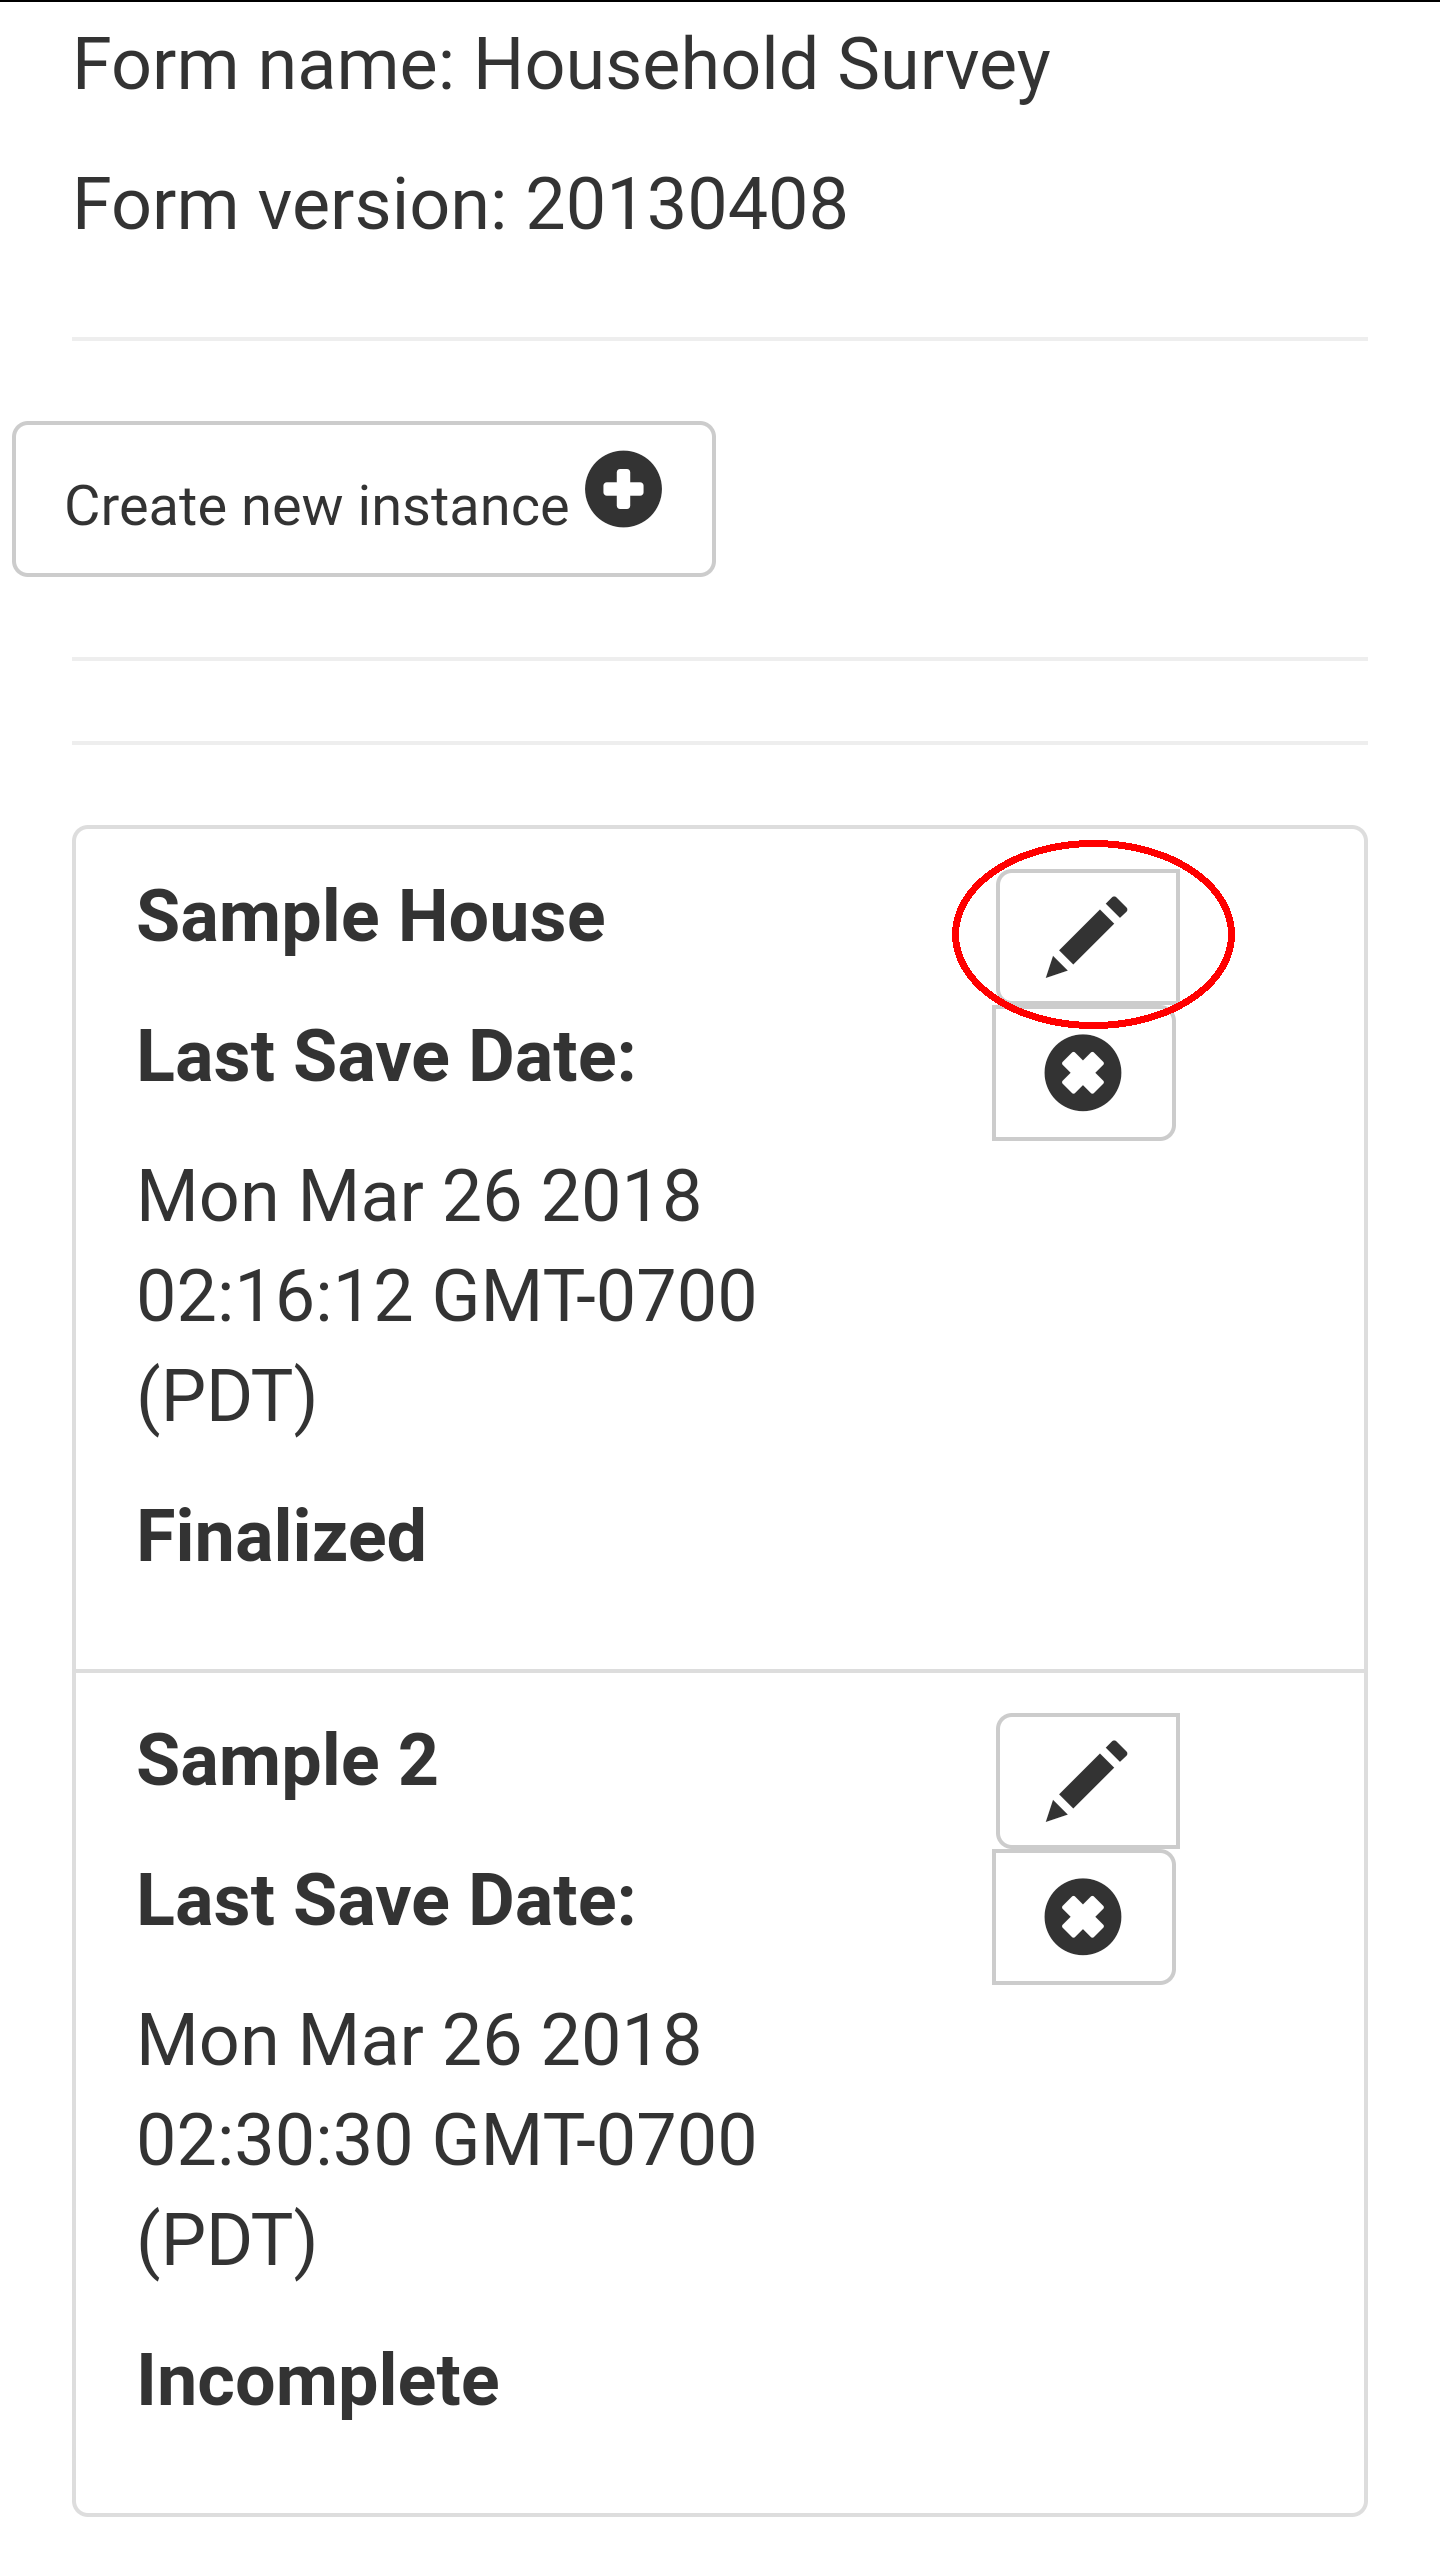
This will launch that instance with all collected values prepopulated. When you save this form as either Finalized or Incomplete, that state will overwrite the previous state of Finalized or Incomplete. The updated form instance will now be the most recently edited form and appear at the top of the list.
Deleting Saved Form Instances
To delete a form instance, tap the X icon next to the instance in the instance list on the form home screen.
Navigating a Form
Forms in Survey are defined in HTML, CSS, and JavaScript. A default look-and-feel, along with an extensive selection of prompt widgets, is provided by the ODK-X framework, but this can be customized by your organization. This guide assumes you are using the default look-and-feel.
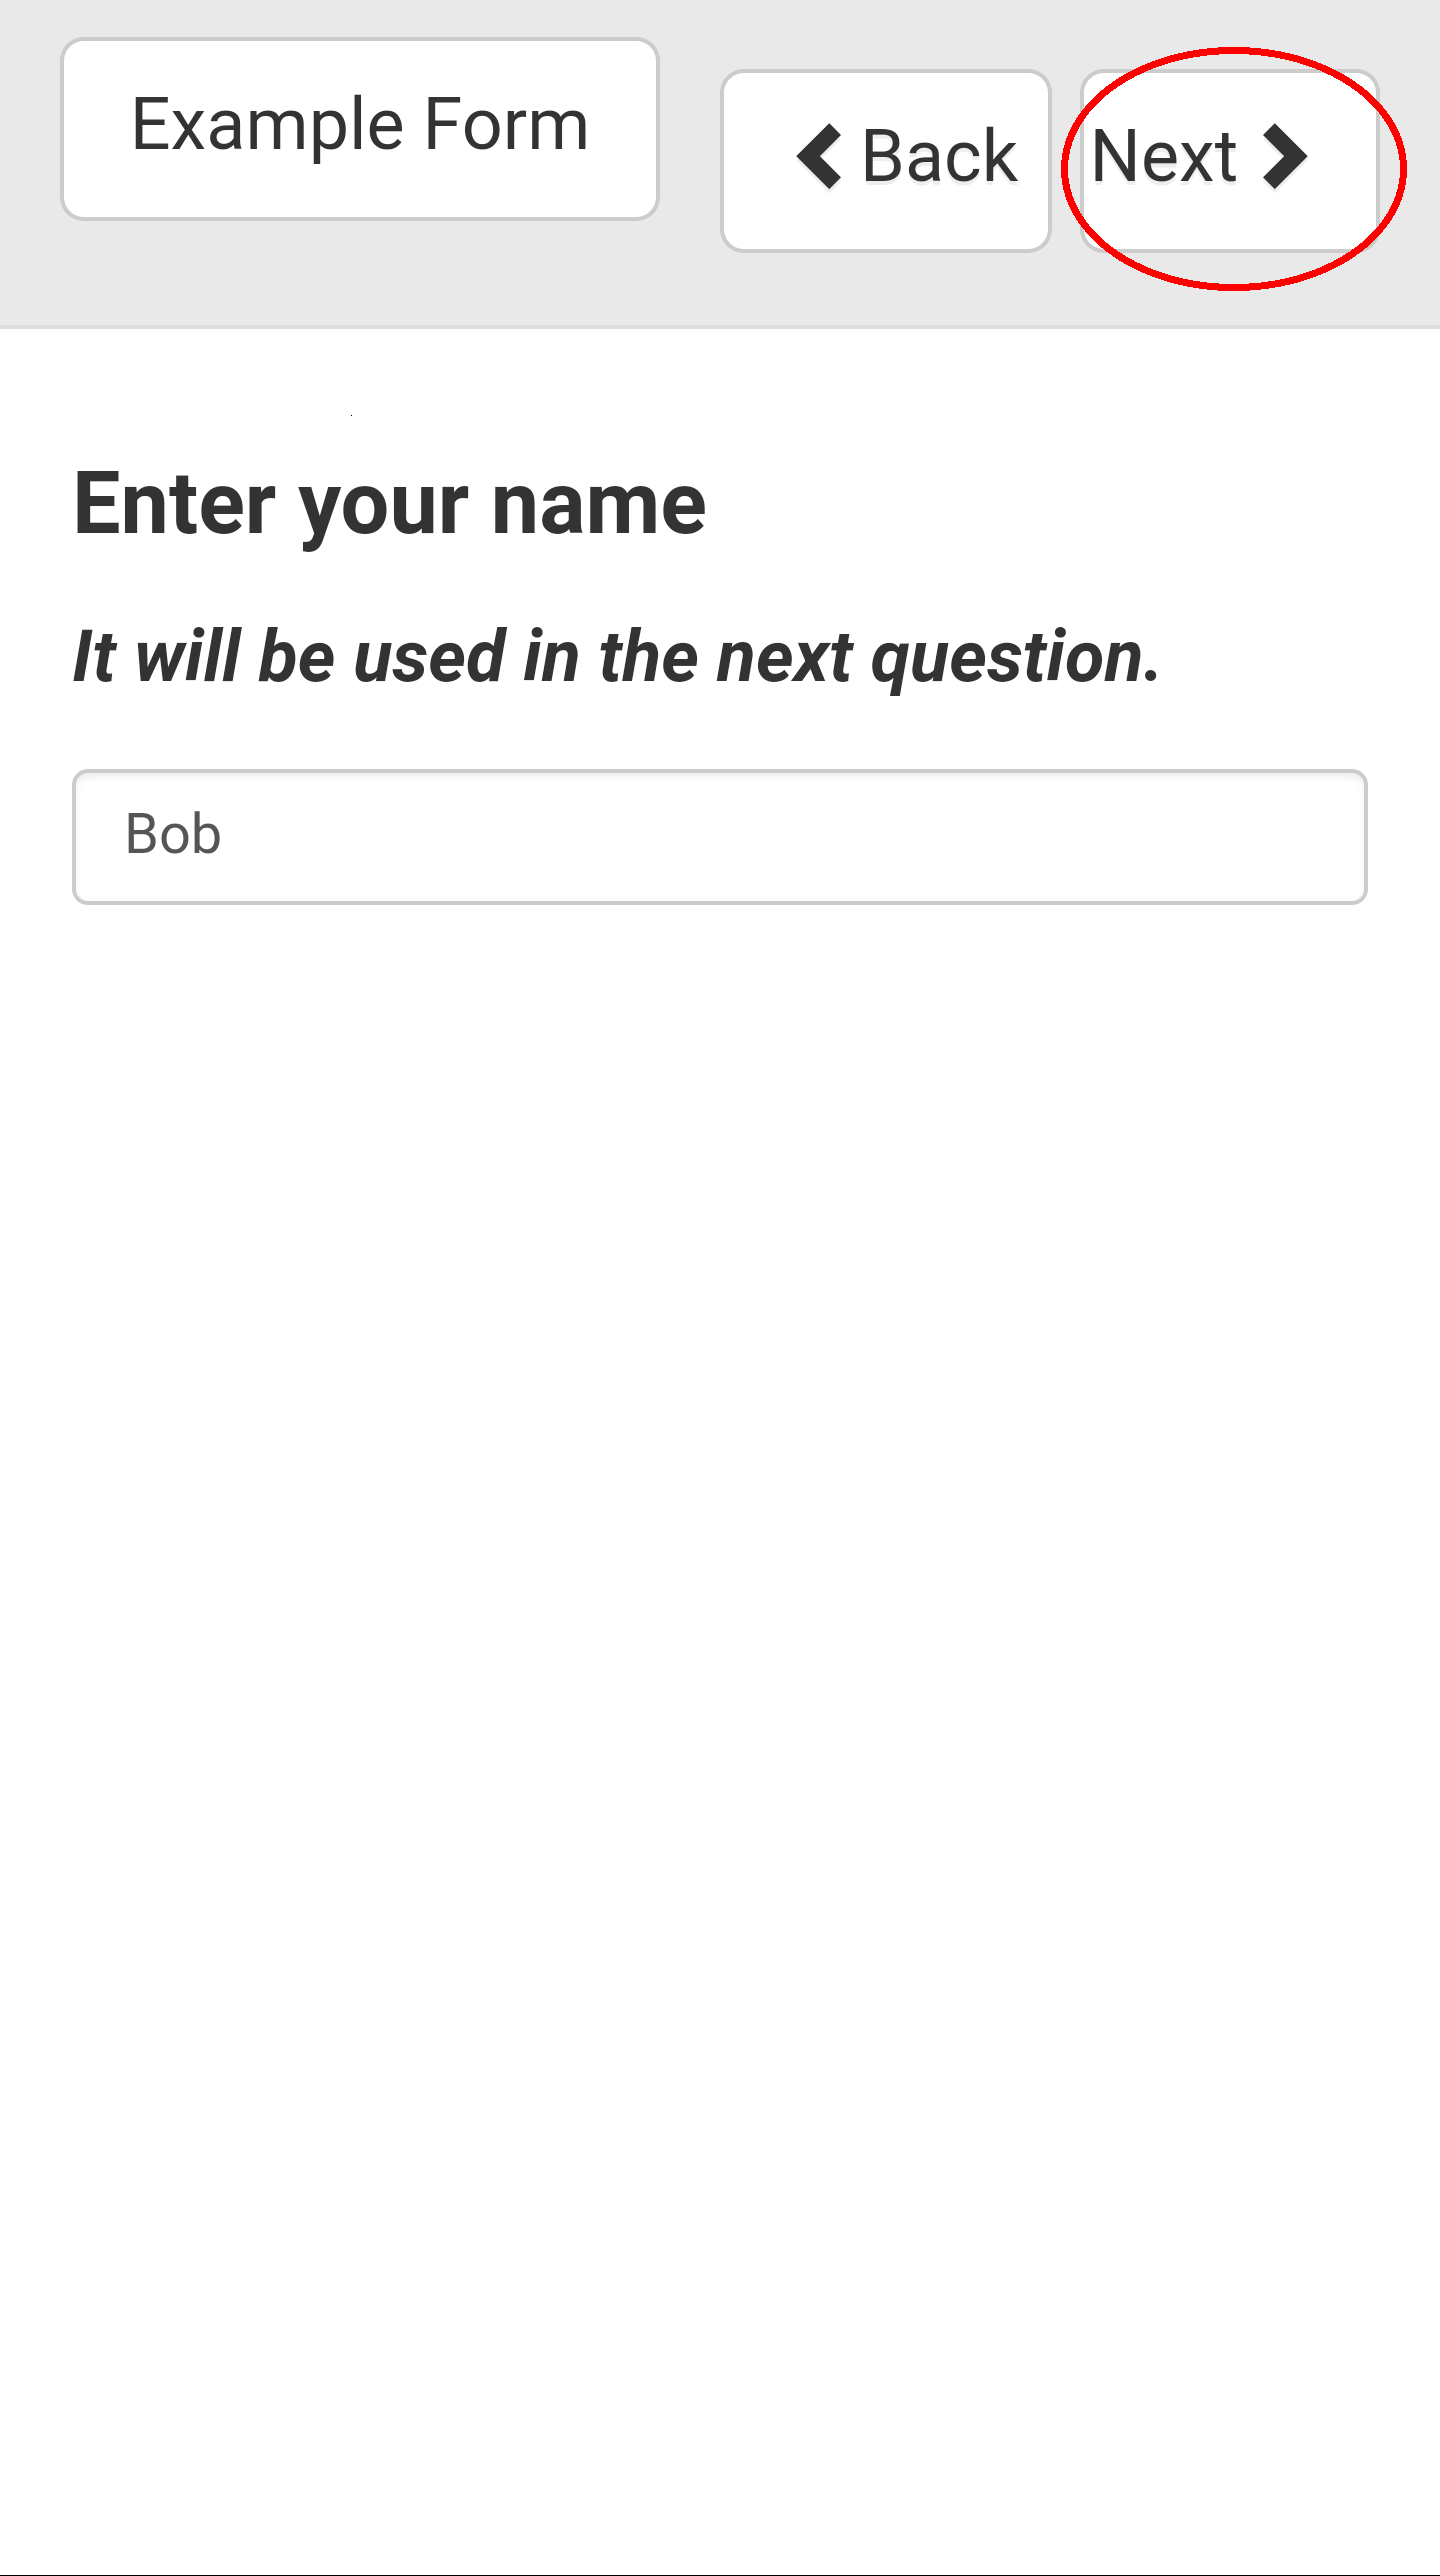
To advance to the next prompt in a form, press the Next button in the upper right.
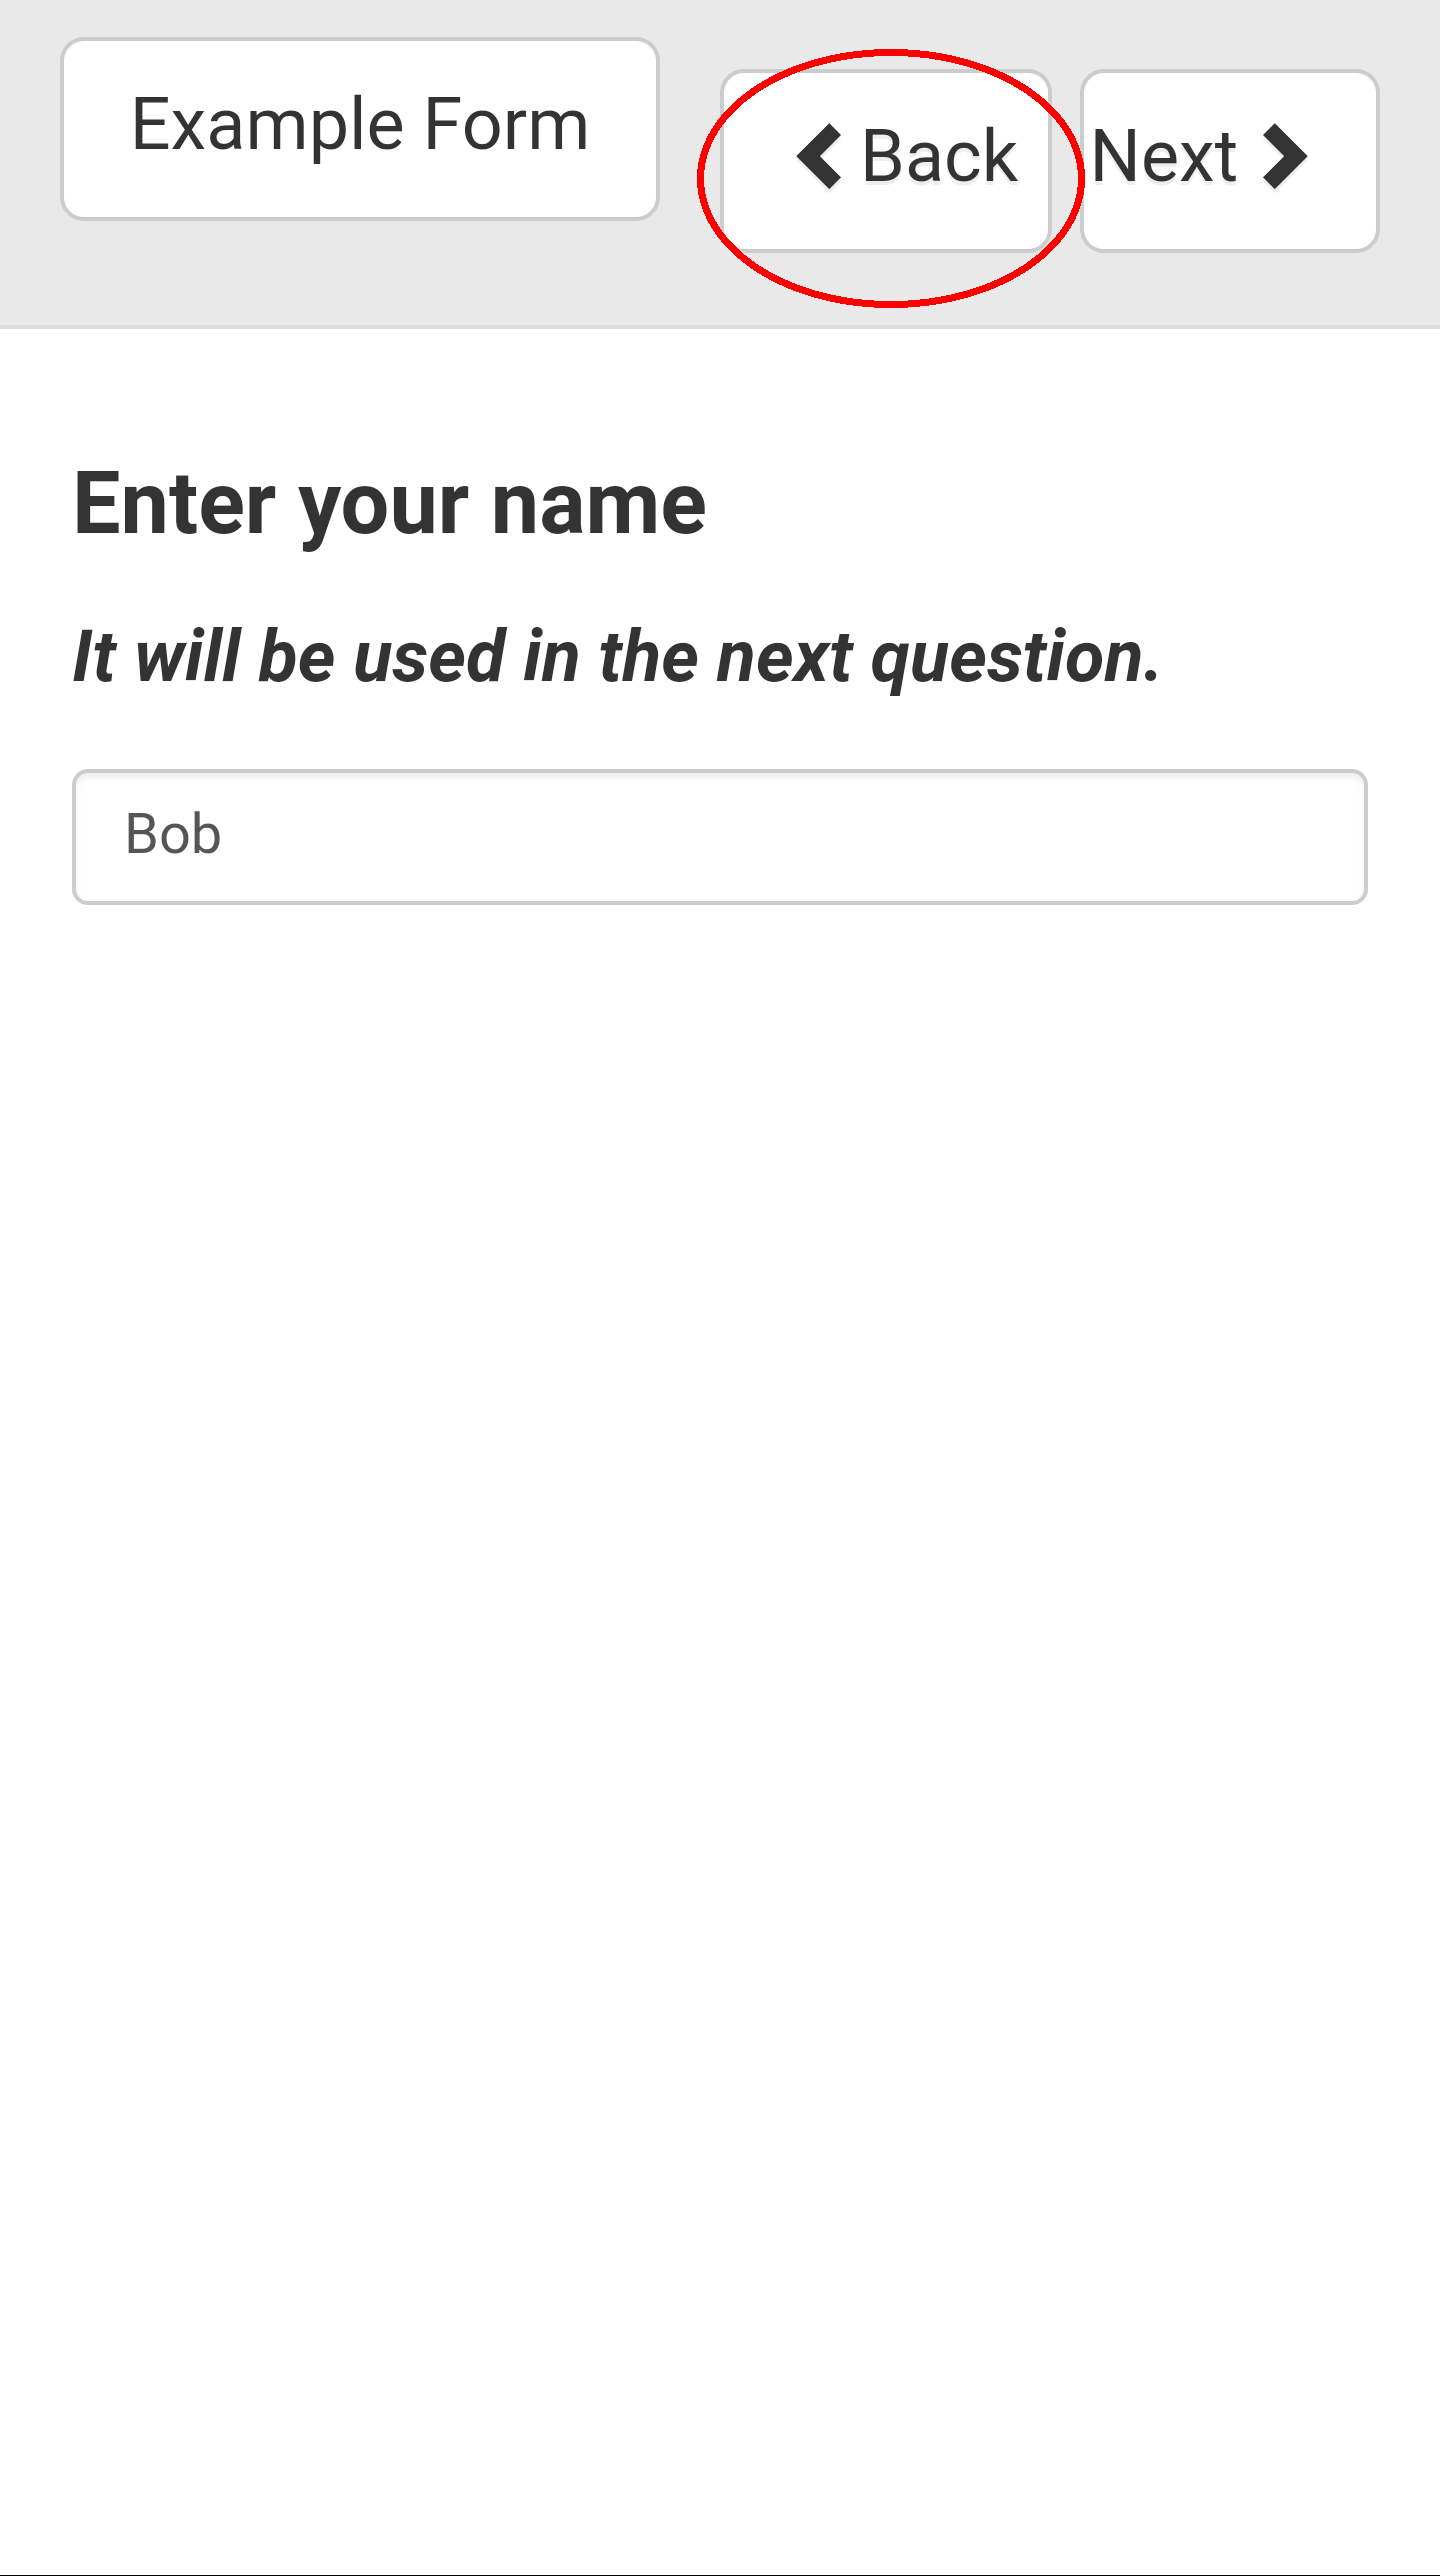
To go back to the previous prompt, press the Back button in the upper right.
To navigate to a specific prompt, press the button on the upper left with the form name to show the menu. Tap the button labeled Contents.
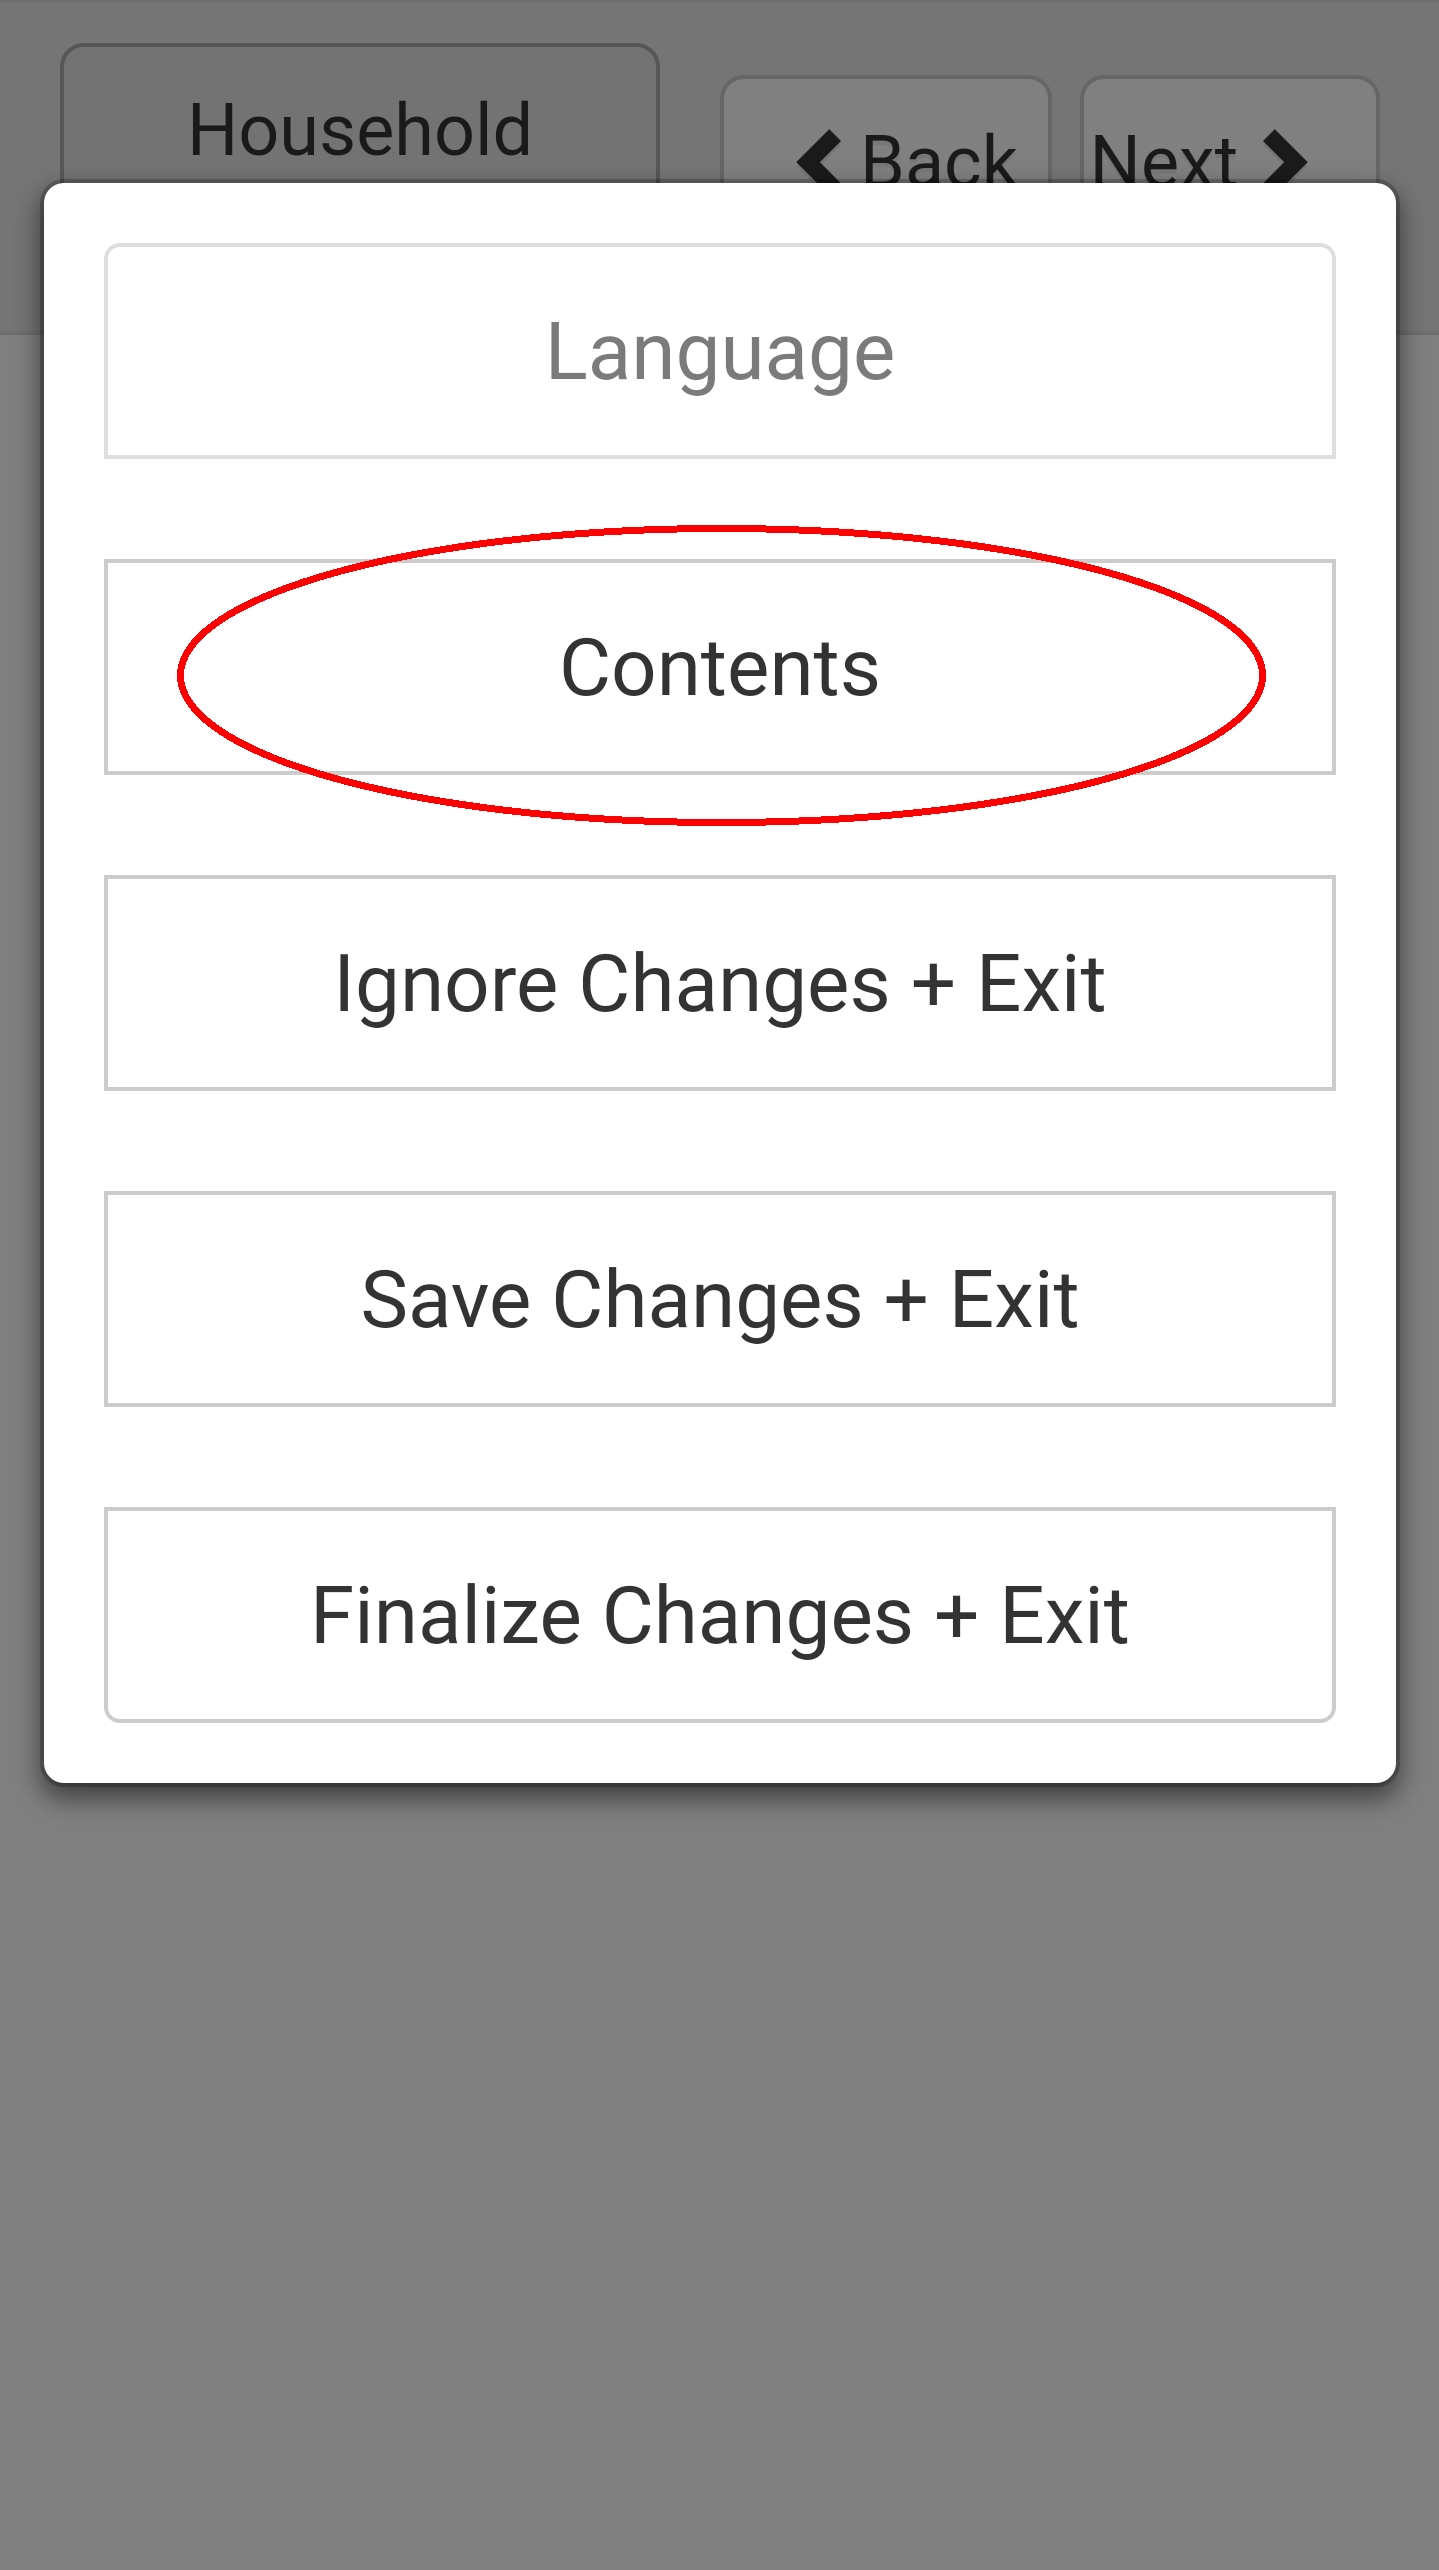
This will bring up a menu with a full list of fields and their recorded values. Tap the desired field to navigate to it in the form.

Every change you make to the data in the form is written immediately to the database as a checkpoint save.
Syncing Forms and Data
See the instructions in the ODK-X Services user guide.
Warning
If a data table has any checkpoint saves (for example, caused by form crashes), the data table will not be synchronized. Checkpoints must be resolved before sync can proceed. The user must open a form on the problem table and either delete the checkpoint or edit the checkpoint. If editing, after that is complete they must save is as either incomplete or finalized. Once the checkpoints are eliminated, the user can initiate another synchronization, and the data in this table will then be synchronized with the information on the server.
Setting up a Form Development Environment
To get started creating your own Data Management Applications, go to the ODK-X Application Designer documentation.
Designing a Form
Basic instructions for designing Survey forms are provided in the ODK-X Survey: Designing a Form.
Survey forms are created in Excel and saved as .xlsx files. These are converted into form definitions using the ODK-X XLSX Converter. The linked guide should help you create and modify the files to create your own forms.
Full XLSX Reference
Use the ODK-X XLSX Converter Reference to find all the features you can use in your Survey forms.
Launching With a Different AppName
The ODK-X tools are designed to support multiple independent Data Management Applications running on the Android device. Each of our tools has the ability to run in the context of either a default application name or a specified application name.
By default, ODK-X Survey runs under the default application name (as does ODK-X Tables and the other ODK-X tools). Application names correspond to the name of the directory under /sdcard/opendatakit where the configuration and data files for that application are stored.
Warning
Though the Android tools support multiple AppNames on the device, each ODK-X Cloud Endpoints only supports one AppName at a time. For each application you have running on the device, you will need a new Cloud Endpoint that is configured with that AppName.
Each Data Management Application will store its own server configuration. Therefore after an initial setup that points each application at its proper server, the user will not need to remember which server hosts which app.
Here we describe how to launch the ODK-X tools into an application name of your choice with the use of widget shortcuts.
First, you must create an alternative application. As a contrived example, we will make an exact copy of the default application on the device with a new name. To do so, first load an application to the device (such as the sample application). Then open Files by Google, navigate to the /sdcard/opendatakit directory, and copy the default directory, renaming it myapp. You have now created the myapp application! It is isolated from and operates independently of the default application.
To launch and use that application:
Android 4.x Devices
Note
Please note that ODK-X Survey version 2.1.9 does not support Android 4.x. Its minimum Android version is 5.0
Choose to view the installed applications.
Select the Widgets tab at the top of that screen.
Navigate through the available widgets, and select and hold the ODK-X Survey Form widget. Drag and drop it onto one of your Android launcher (home) screens.
A list of available applications and forms will appear, in the form of application name for applications, and for each form within an application. Pick the application that you created via Files by Google.
Android 5.x and Higher Devices:
Long press an open area of the device home screen
Select the Widgets tab at the bottom of resulting screen.
Navigate through the available widgets, and select and hold the ODK-X Survey Form widget. Drag and drop it onto one of your Android launcher (home) screens.
A list of available applications and forms will appear, in the form of application name for applications, and for each form within an application. Pick the application that you created via Files by Google.
Trying the New Launcher
Now, play around with launching ODK-X Survey using this application shortcut and Finalizing a new filled-in form. Exit ODK-X Survey, and launch it from the applications list (so that it launches as the default application). Verify that you do not see that newly filled-in form. You can also create a new filled-in form in this default application and confirm that it is not visible in the myapp application.
This highlights the isolation of Data Management Applications in the ODK-X tools. This is even more powerful with applications that use ODK-X Tables because you can create entirely isolated applications, such as a forestry app and a health clinic app, and have the forms and data entirely independent of each other.
This eliminates the need for different groups to fork the ODK-X code base.
Making a New AppName
Download a new copy of ODK-X Application Designer. Clear out the
configdirectory as you normally would.Open
app-designer/gruntfile.js.In the
modle.exportsfunction, find the variabletablesConfig.Modify the value of
appNamein variabletablesConfig. This value starts as default. Set it to the desired new AppName.Note
The new AppName cannot be the same as another AppName that already exists on the device.
Save
Gruntfile.jsDevelop your Data Management Application and push it to the device the normal way (instructions in the guide).
Using the above technique will keep your apps cleanly separated. You can also maintain multiple Data Management Applications in the same Application Designer instance by making alternative app-designer/app directories and creating new Grunt tasks to push them to the device.